 Maximize button on the upper-right to make the window fill the screen. To make the one-line window fill the EasyPower session, click its maximize button also.
After you start EasyPower, the session window opens. Click the window's Maximize button on the upper-right to make the window fill the screen. To make the one-line window fill the EasyPower session, click its maximize button also.
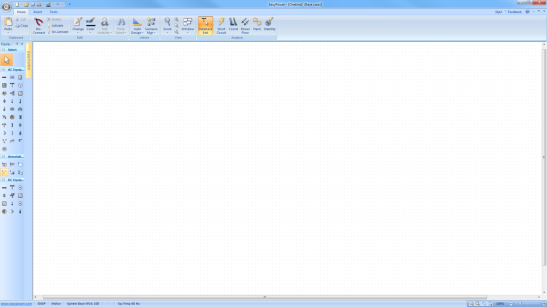
Figure 1: EasyPower Session
The session window elements are described in the topics that follow.
Ribbons let you tell EasyPower what you want to do next. Ribbon buttons that are unavailable at a given time are dimmed. Some buttons have a down-arrow symbol ![]() indicating additional options are available.
indicating additional options are available.

Figure 2: EasyPower Ribbon
Ribbons were introduced in EasyPower 9.0. Previous versions supported a menu bar and toolbars. You can display menu bars and toolbars in place of the ribbons or change the appearance of the ribbon by choosing Style from the upper right area of the window.
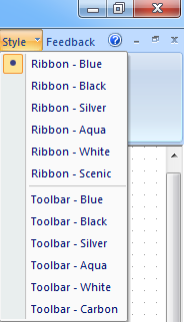
Figure 3: Change Style

Figure 4: Quick Access Toolbar
The Quick Access Toolbar is located at the top left area of the EasyPower window when the style is set to ribbons. By default this toolbar has the commands New (create a new one-line), Open, Save, Print and Undo.
Click  Customize Quick Start Toolbar to add or remove items from the toolbar.
The menu bar lets you tell EasyPower what you want to do next. The menu bar is displayed only when the style selected is Toolbar. Menu options that are not available at a given time are dimmed.

The standard toolbar provides shortcuts to often-used commands. Options that are not available at a given time are dimmed. Click the drop-down arrow ![]() at the right of the toolbar to customize the toolbar. You can choose the buttons you want to display or organize the buttons in the order you want them.
at the right of the toolbar to customize the toolbar. You can choose the buttons you want to display or organize the buttons in the order you want them.

Figure 6: Standard Toolbar
There is an additional toolbar under the standard toolbar that provides shortcuts to add equipment to the one-line. This is similar to the Equipment Palette used in the ribbon style. Click the drop-down arrow at the right of the toolbar to customize the toolbar. You can choose the buttons you want to display or organize the buttons in the order you want them.
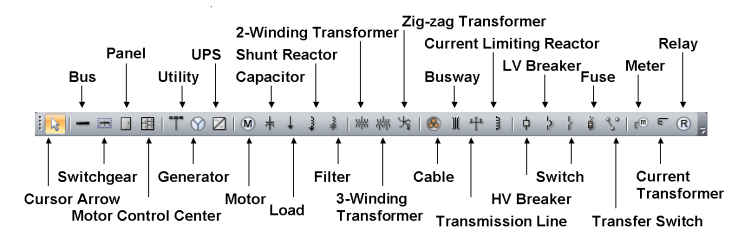
Figure 7: Equipment Toolbar
For more information on what each toolbar button does, hover the pointer over a particular button for about a second to see a tooltip that displays the button name and a brief help description.
In addition to ribbons and toolbars, you can click the right mouse button anywhere on the screen to display an additional context-sensitive menu. The menu changes based on where you are working in the software. Only options that are appropriate for that area are displayed. Some options may be appropriate for the area but are dimmed until a specific action is taken (for example, only after selecting an item onscreen).
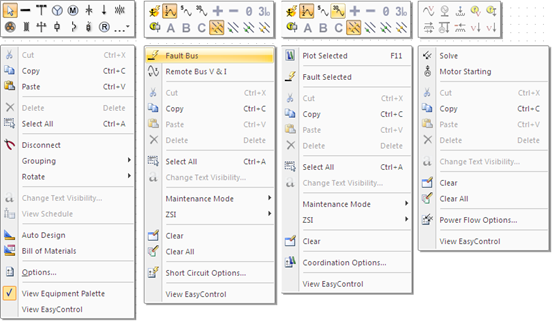
Figure 8: Context Menu Examples
There is an optional Status bar at the bottom of the session window that provides information about settings you have chosen. The information displayed varies slightly depending on the current focus you are in.

Figure 9: Status Bar
In the ribbon style, the Equipment Palette enables you to add AC or DC equipment and notes ("Annotations") to the one-line. This is similar to the Equipment Toolbar, and the symbols for both are the same. While you are editing the database, the equipment palette provides the necessary equipment types to create a power system one-line diagram.
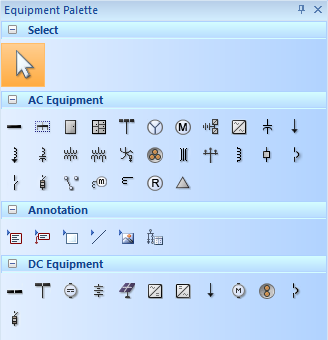
Figure 10: The Equipment Palette
Tip: When using the ribbon style you can also insert items through the Insert ribbon.
You can hide or show the equipment palette by right-clicking in the one-line area and selecting the desired option from the context menu.
| Your First EasyPower One‑line | |
| EasyPower Focus |