 New Drawing. A new drawing is added to the drawing list.
 You can create multiple drawings from the same one-line file. The drawing feature enables you choose a selected part of the system or the entire system and put them into a separate drawing for the purpose of printing to a specific format or for viewing. You can rearrange the positions of the equipment in the drawing and format the pages. This enables you to have multiple views of the same one-line.
You can manage drawings through the EasyControl toolbox. If you hover the pointer over the EasyControl tab, the toolbox expands to display the drawing options along with a list of drawings that have been created. If you do not see drawings here, make sure Drawing is highlighted at the bottom of the toolbox.
To create a new drawing:
New Drawing. A new drawing is added to the drawing list.
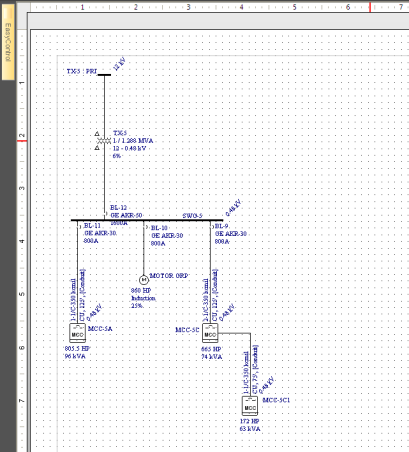
Figure 1: Example of a Drawing View
You can set default drawing options so that when you create drawings, the defaults you have chosen are used. To set the default for drawings click Tools and then click  Drawings (toolbar menu: Format > Drawing Defaults).
Delete any item from the drawing by selecting the item and pressing DELETE.
You can edit equipment data by double-clicking on the equipment and changing data through the dialog. The data changed is global—it affects the main One-line and all the drawings.
This command enables you to insert in the drawing any item that is connected to the selected item but not yet in the drawing. Right-click on any item in the drawing and select Insert Existing Item. If there are connected items not yet shown in the drawing they are listed. Select the desired items to insert them. If the item is not directly connected to the selected item, you can insert one item after another until you get the desired item.
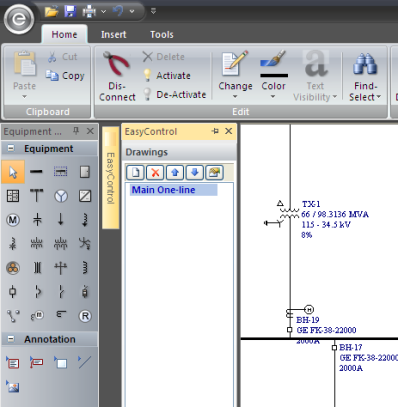
Figure 2: EasyControl Toolbox
The EasyControl Toolbox includes the following commands:
New Drawing: Creates a new drawing. First select items from the one-line that you want to include in the drawing, and then click New Drawing. Delete Drawing: Deletes the selected drawing.
 Drawing Properties: Displays the Drawing Properties dialog box of the selected drawing where you can customize the drawing properties, including the page, title block, grid, and notes.
The Drawing Properties dialog box enables you to customize the drawings. Each drawing can have its own custom properties.
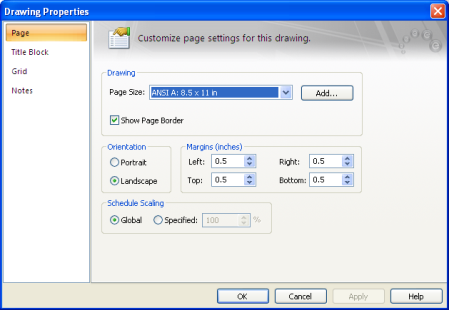
Figure 3: Drawing Properties Page Options
Note: If you need to modify an existing custom page size, first select the page size name from the list, then make the changes and click Add/Modify. You can also delete page sizes that have been defined by selecting the page size name and then clicking Delete. Cancel closes the dialog without making any changes.
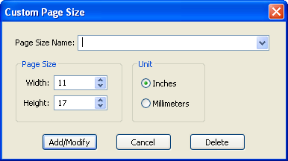
Figure 4: Custom Page Size dialog
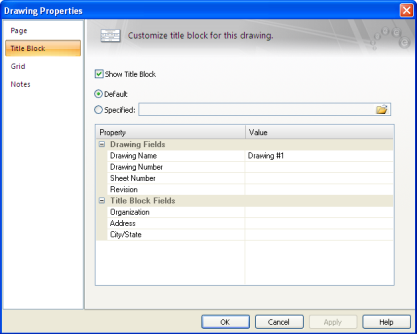
Figure 5: Drawing Properties Title Block Options
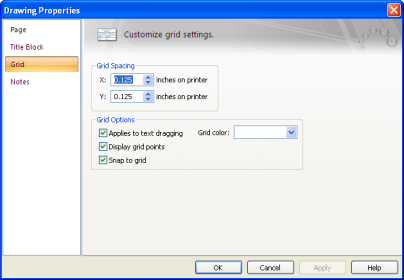
Figure 6: Drawing Properties Grid Options
Add any text in notes regarding the drawing.
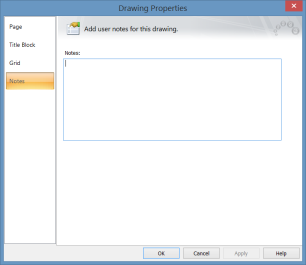
Figure 7: Drawing Properties Notes Options
Drawing options enable you to set the page size, title block defaults, and global options for all new drawings. To open the drawing options, click Tools and then click Drawings (toolbar menu: Format > Drawing Defaults).
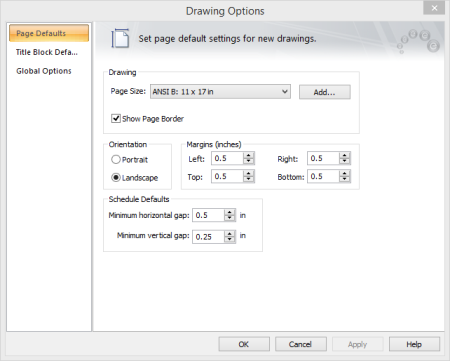
Figure 8: Drawing Defaults Page Options
Note: If you need to modify an existing custom page size, first select the page size name from the list, then make the changes and click Add/Modify. You can also delete page sizes that have been defined by selecting the page size name and then clicking Delete. Cancel closes the dialog without making any changes.
Figure 9: Custom Page Size Dialog Box
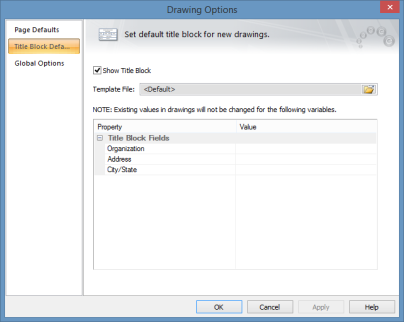
Figure 10: Drawing Defaults Title Block Options
 Open to browse for a title block template. These are stored in the location specified in Tools > Options > File Locations. Templates can be customized.
 Text Visibility
| Making One‑line Diagrams | |
| Drawing Title Block Template |