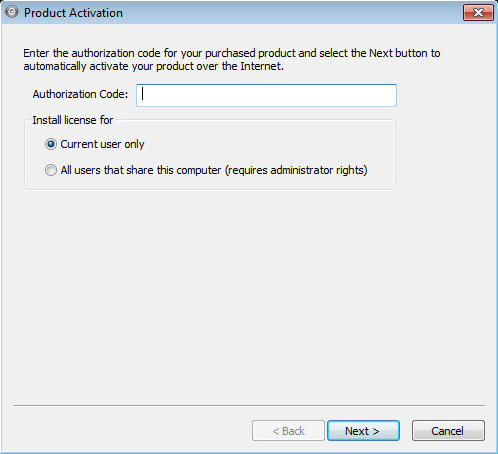
Figure 1: Product Activation Window
Note: If your authorization code indicates this is a network installation, the software attempts to locate the server automatically. If the USB license key is not inserted, you will be instructed to insert it. If it still cannot be found (for example, the key is inserted but the server is located on another network), you will be given the opportunity to enter the server's IP address.
If the computer is not able to connect to the Internet to complete the authorization, you will receive an error message. Check your Internet and firewall connections, and try again. If you do not have Internet access on this computer, see Authorizing Your Software Offline.
For licenses that do not require a hardware key, the only valid option is current user. The program automatically switches to this option and displays a message indicating this has occurred if a keyless license is being used.
- Select your default settings for units, short circuit standard, and frequency. These settings are used as defaults for all new one-lines, but you can change them at any time in Tools > Options on the System tab.
- Select your default equipment symbols. This setting is also used as a default for all new one-lines, but you can change them at any time in Tools > Options on the One-line Symbols tab.
- Decide if you want to participate in the EasyPower Product Improvement Program by selecting or clearing the check box. We encourage you to participate—the program is voluntary and anonymous. To learn more about the program, click Read about our policy.
Note: If your EasyPower license is for both ANSI and IEC short circuit, select the one you use most often. You can change the short circuit setting in Tools > Options when you need to switch between them.
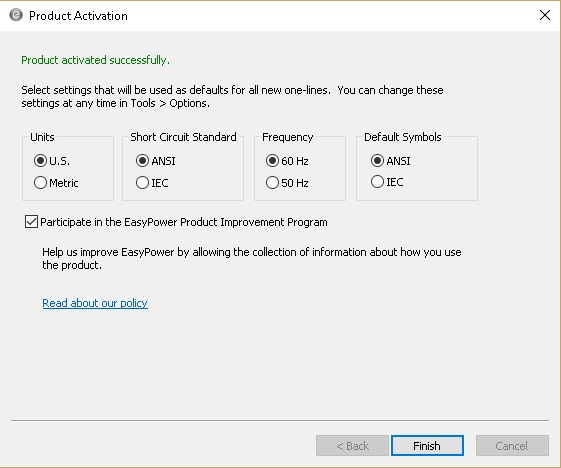
Figure 2: Product Activation - Participation Window