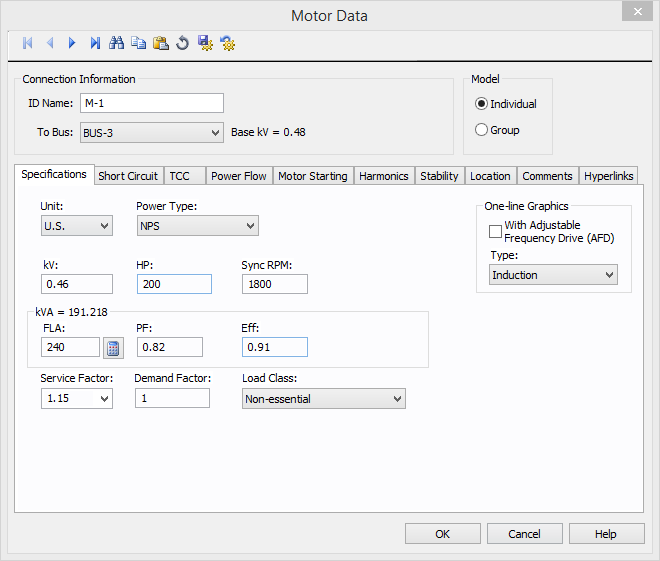
Figure 1: Entering Motor Data
This section describes how you can enter the equipment data.
Note: The bus names that appear in the Connection Information area of the database window may not match the names in our examples. You might add the items in a different order than we did, so the automatic name assignments will be different.
Double-click on one of the motors, and fill out the dialog box as shown below. Do not change the To Bus field, because that would change the one-line connections.
Fill out the X/R field last by clicking the Short Circuit tab, and then clicking Calculate. After you enter the data, click OK. If you have not filled out all of the necessary fields, you will receive a message asking if you want to save what you have entered.
Tip: You can turn this message off in Tools > Options > General.
Figure 1: Entering Motor Data
Rather than entering data separately for each motor, use the Copy and Paste toolbar buttons. First, select the motor that already has data by clicking it (the motor will turn green). Then, click  Copy. The motor's data is copied to the clipboard, meaning it is stored in the computer's memory.
Select all of the other motors on the one-line. This can be done by dragging a rectangle around the motor when the  Select pointer is active.
Note: If you have non-motor items selected also, they will be ignored.
Click  Paste. The motor horsepower, type, and other information is pasted into each selected motor.
Double-click on one of the cables and fill out the dialog box as shown here. Do not change the To Bus or From Bus fields, because that would change the one-line connections. Fill out the Impedance fields last by clicking the Calculate button. After you have the data entered, click OK.

Figure 2: Entering Cable Data
Use Copy and Paste to copy that cable's data to the other two, just like you did for the motors.
Double-click on the transformer and fill out the dialog box as shown here. Do not change the To Bus or From Bus fields, because that would change the one-line connections.
Click the Impedance tab and type 6 in each Z field, then fill out the X/R field last by clicking on Calculate. Click OK.
![]()
Figure 3: Entering Transformer Data
Double-click on the utility and fill out the dialog box as shown below. Do not change the To Bus field, because that would change the one-line connections.
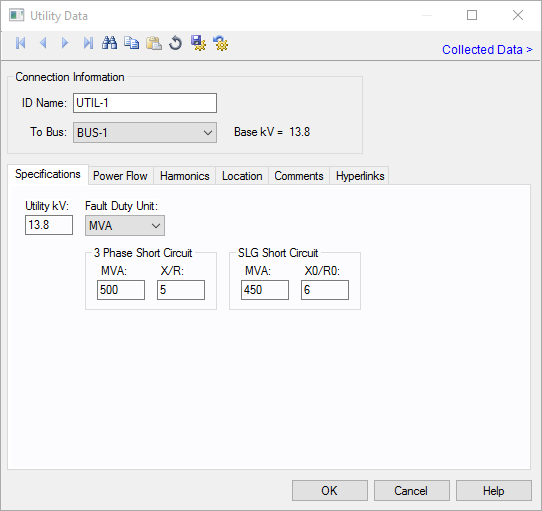
Figure 4: Entering Utility Data
Now that the one-line is basically done, you can turn off the grid. This makes the analysis numbers easier to see. Note that the snap to grid feature is still on, even if the grid dots are no longer being displayed.
Click Tools > Options > Grid and then click Show Grid to remove it.
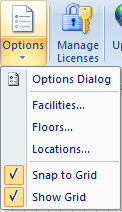
Figure 5: Show Grid Option
In the Home tab, click  Zoom Out Full to see all the database data on your screen.
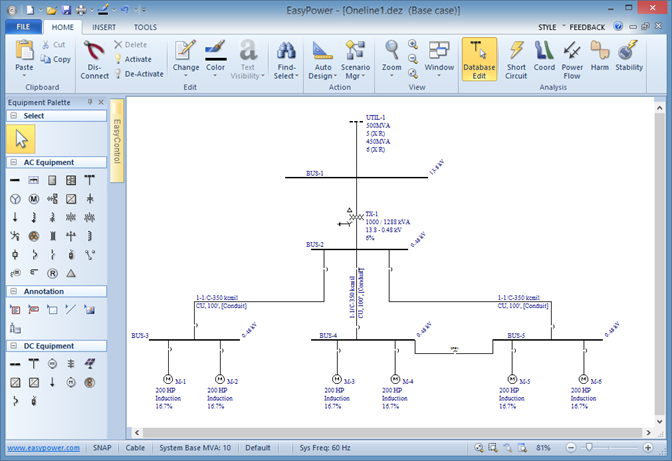
Figure 6: Viewing the Entire One Line
|
|