Selecting Items
Many operations require you to select one or more items in the database first.
Selecting an Individual Item
Click an item to select it, and then select the action you want to take. By default, the color indicating a selected state is green, but this can be changed in Tools > Options > Color.
For example, select an item and then press DELETE to delete the selected item.
Selecting All Items
To select all items in an active one-line or an entire text report, do one of the following:
- On the keyboard, press CTRL+A.
- In the ribbon view, click Find-Select > Select All.
Selecting with the Mouse
The simplest way to select an item is to move the  Select pointer over the item and click on it.
To select a group of items in a region, click and hold the left mouse button while dragging a rectangular shape around the items you want to select.
When you click to make a new selection, this automatically removes the selection of currently selected items. To select additional items without removing the currently selected items, hold down the SHIFT or CTRL key and select the additional items.
Deselecting an Item from a Group
If you accidentally select an unwanted item while selecting a group of items, you can deselect the item by holding down the CTRL key and clicking on the item.
Selecting by an Item's ID Name
In the Home tab, click  Find-Select to find an item by its item type and ID name.
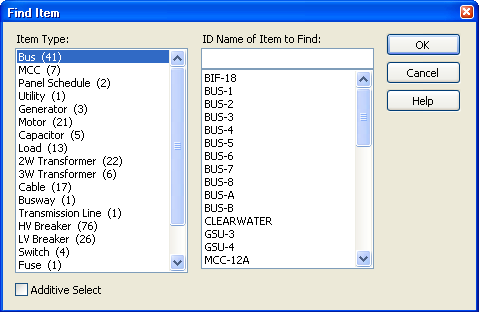
Figure 1: Find Item Dialog Box
In this example, we are selecting a bus with the ID name of “BUS-4.”
- In Item Type, select the type of equipment—for example, bus. Only equipment present in the one-line is displayed.
- The ID Name of Item to Find list contains the ID names of all the available buses in the one-line. Select the desired ID name—in this example, Bus-4.
- To select the item without clearing other items already selected, select the Additive Select check box.
- Click OK. The selected item is shown on the one-line.
When you select an item using this method, if your current zoom level is less than 90%, the selected item (or last selected item if you used Additive Select) is centered in the window and the one-line is zoomed to 100%.
Querying to Select
To select multiple items that match certain criteria from a query, from the Home tab, click Find-Select > Query.
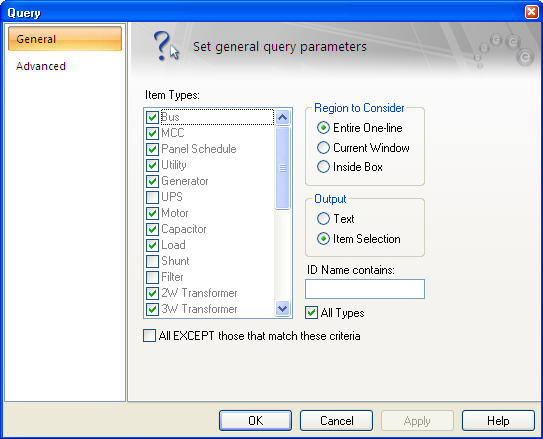
Figure 2: Query Dialog Box
More Information
| Making One-line Diagrams | |
| Adding Items to the One-line |