Performing a Server Installation
If you are not installing to a server on a network, you can skip this section and proceed to Performing a Typical Installation.
A server installation is used for network installations. The EasyPower software is installed on a server computer and on other computers ("clients") on the network. The server manages the license service that the EasyPower program uses to authorize the software on each computer.
If you have a USB key for EasyPower, a server uses the red USB key. Other installation types use a purple USB key. The key is required during installation and must be inserted in the computer whenever you run EasyPower.
Important: If you are using a software lock (SL) license key, do not clone the server that is used to manage your EasyPower SL licenses. Doing so can cause your license to stop working. If you need to migrate to a new server, see Transferring an SL key.
Install the Software
To perform a server installation:
Important: For network installations, perform the server installation and activation on your network server before installing the program and activating it on your client computers. The server manages the program licenses and must be activated first.
- Do one of the following:
- Click the download link in the email you received that includes the Serial Number and Authorization Code.
Browse to the EasyPower Updates page at www.easypower.com/updates/login, enter your Serial Number, and then click Submit. Download the update for your current version of the EasyPower software. You must have a current maintenance plan to download an update.
-
After the download is finished, open your Downloads folder and double-click on the executable file (for example, EasyPowerSetup10.4.x.xxx) to start the installation process.
- If you receive a User Account Control message, click Yes.
- EasyPower requires certain software to be installed before you can install the program. If the installation detects any prerequisite software is missing, you are asked to install the software. Click Install and follow the prompts to install the software. The steps to install may vary slightly depending on which prerequisites are needed.
- In the Welcome to the installation window, click Next.
- In the License Agreement window, read the agreement, select I accept and agree to the terms in the license agreement, and then click Next.
- In the Setup Type window, select Server, and then click Next.
- In the Destination Folder window, click Change if you want to select a different installation location on the server; otherwise, click Next.
- In the Ready to Install the Program window, click Install.
- The Installing EasyPower window is displayed to show the installation progress.
- In the Install Completed window, click Finish.
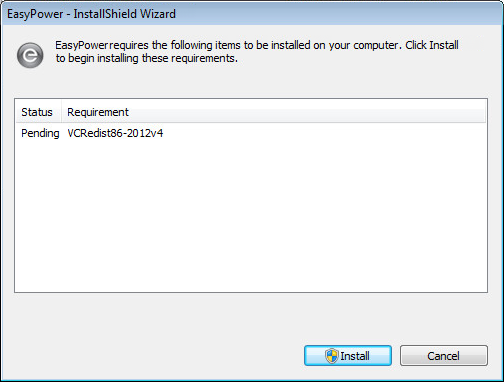
Figure 1: Installing Prerequisites Window
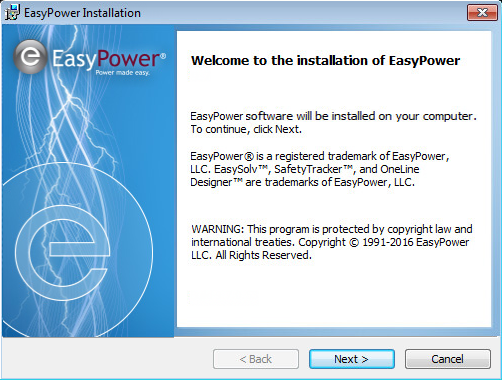
Figure 2: Welcome to the Installation Window
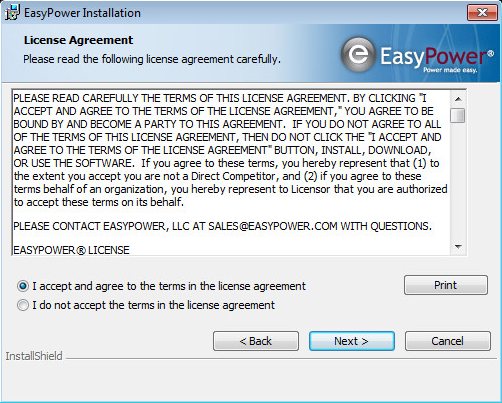
Figure 3: License Agreement Window
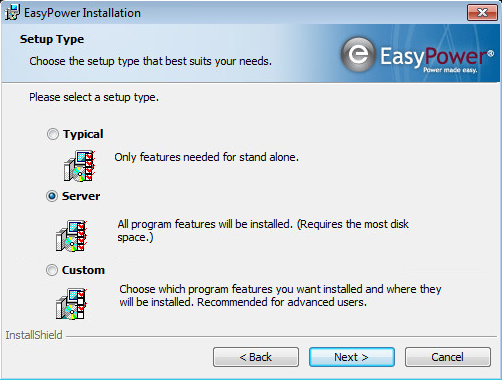
Figure 4: Setup Type Window
Note: Beginning with the 9.6 release, the program files are no longer shared between the server and client computers. The EasyPower software is installed locally to each computer, so it is not necessary to install the software to a network-accessible location.
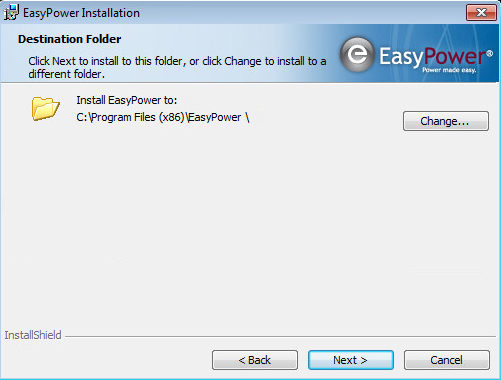
Figure 5: Destination Folder Window
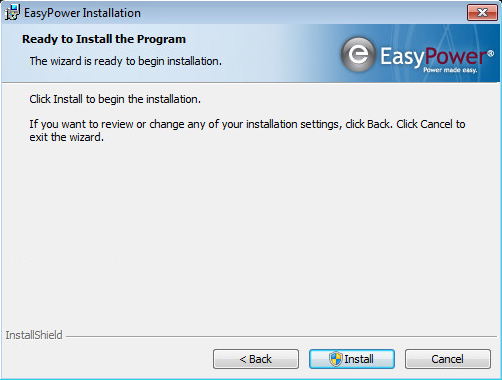
Figure 6: Ready to Install Window
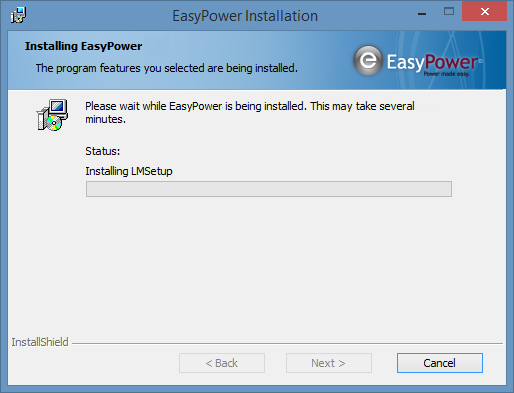
Figure 7: Installing EasyPower Window
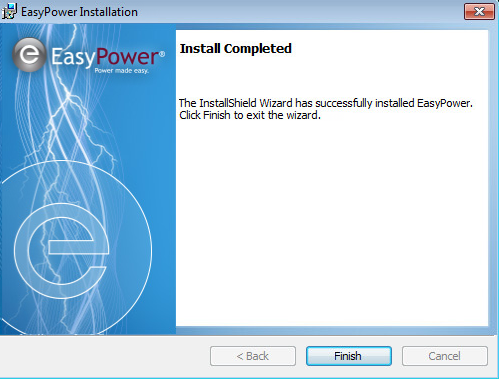
Figure 8: EasyPower Installation Complete Window
After Installing
If you are using an SL license key, use the Key Management Utility to input your authorization code before starting your EasyPower software. See Installing or Updating a Key for more information.
The first time you run your software, you will be asked for your authorization information. See Authorizing Your Software for more information.
For instructions on installing EasyPower software to your client computers, see Performing a Typical Installation.
If you want to share your data files (such as one-lines, device libraries, and templates), see Sharing the EasyPower Data.