Activating Your Software Offline
An Internet connection is required to activate your EasyPower software. If you do not have an Internet connection, you will receive an error message when you attempt to activate the software.
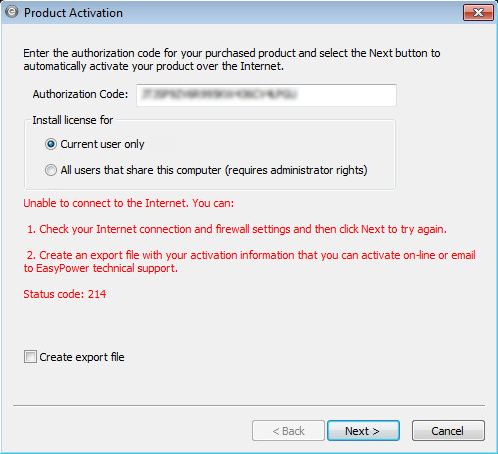
Figure 1: Product Activation Dialog Box - Not Connected to the Internet
Resolving Network Connection Issues
Check your network to ensure you are connected and that there are no firewall restrictions preventing you from connecting to the site. See Troubleshooting the Installation for more information.
After your network connection issues are resolved, click Next to continue.
Activating Your Software Offline
If the computer on which you are trying to activate the software does not have a network connection, you can still activate the software manually using another computer. The process is as follows:
- Select the Create export file check box and then click Next to create an export .request file.
- Select the location where you want to store the file.
- Copy the .request file to a USB drive or other storage device, and then take the copy to a computer that has access to the Internet.
- Upload the .request file to the EasyPower web page located at https://www.easypower.com/offline-activation.
- You will receive a .response file from the website or from technical support. Copy the .response file to a USB drive or other storage device.
- Take the .response file to the computer where you want to activate the software, and copy the file to the computer. In the Product Activation dialog box you opened in Step 3, click Next.
- Browse to the location of the .response file you received from the web page or technical support and copied in Step 6. Select whether you want to install the license for only the current user or for all users, and then click Next.
- In the Product Activation window, do the following:
- Select your default settings for units and the short circuit standard. These settings are used as defaults for all new one-lines, but you can change them at any time in Tools > Options on the System tab.
- Decide if you want to participate in the EasyPower Product Improvement Program by selecting or clearing the check box. We encourage you to participate—the program is voluntary and anonymous. To learn more about the program, click Read about our policy.
- Click Finish to complete the installation.
- In the splash screen, select Start Program to start using EasyPower.
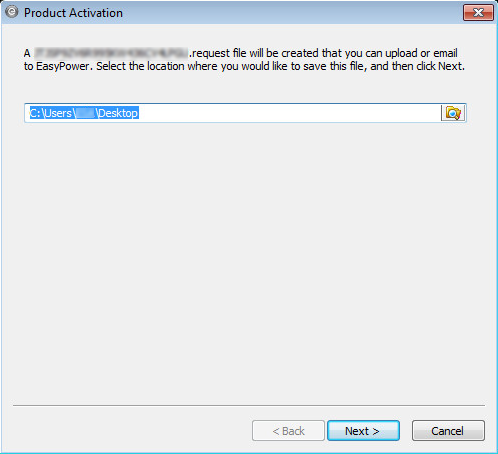
Figure 2: Product Activation Dialog Box - Create a .Request File
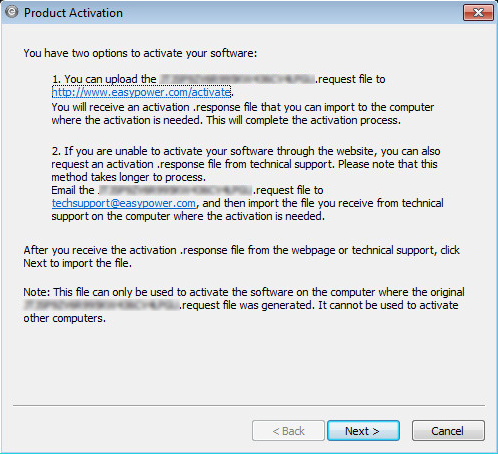
Figure 3: Product Activation Dialog Bog - Activation Options
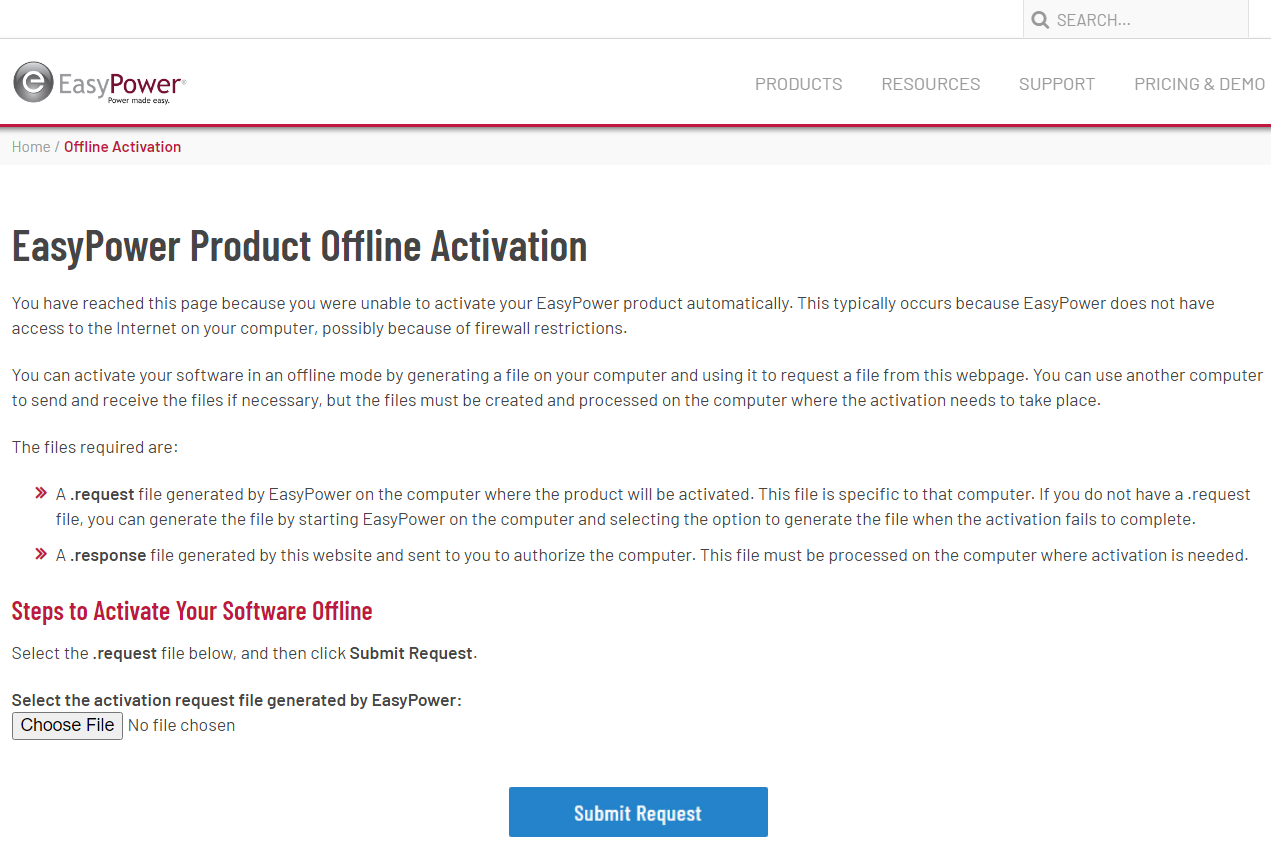
Figure 4: EasyPower Product Activation Web Page
Click Browse on the web page to browse to the location of the .request file you copied to the computer in step 3, and then click Submit Request.
Alternatively, you can email the file to EasyPower technical support, but this process will take longer.
Important: The .response file can only be used to activate the original computer where the .request file was generated.
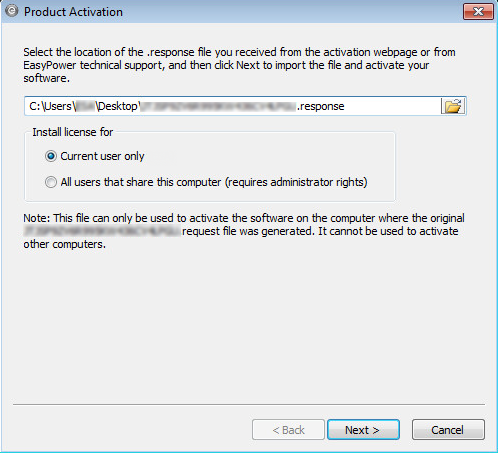
Figure 5: Product Activation Dialog Box - Select .Response File
For licenses that do not require a hardware key, the only valid option is current user. The program automatically switches to this option and displays a message indicating this has occurred if a keyless license is being used.
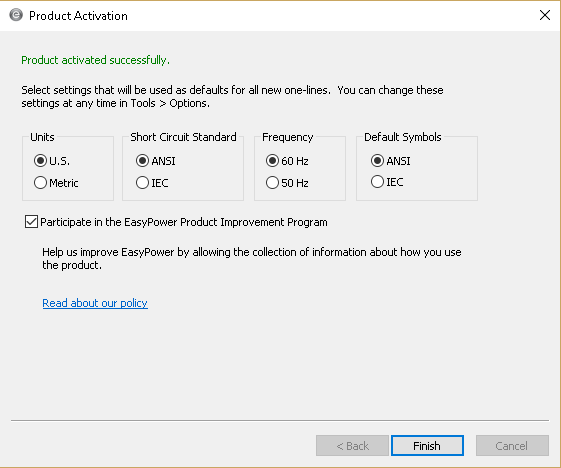
Figure 6: Product Activation - Participation Window
Figure 7: EasyPower Splash Screen
Note: If you have multiple licenses for your software, you can add additional licenses from within EasyPower by selecting Tools > Manage License Keys.