MCC Elevation
Create the Elevation
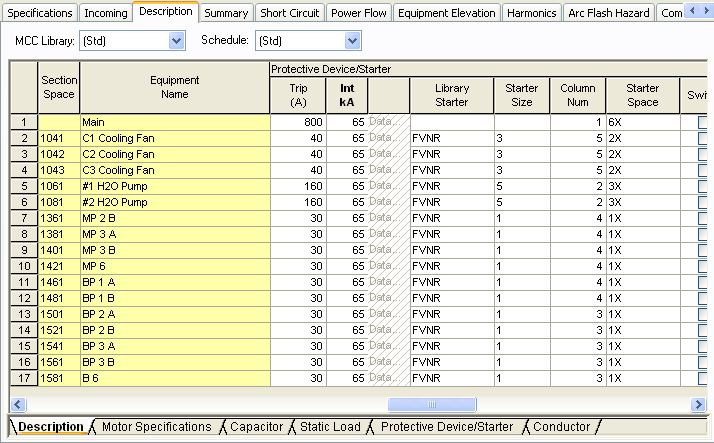
In the Description tab of the MCC dialog you can specify the location and size of each bucket (space).

Figure 1: Specifying Column Number and Starter Space in the Description tab
You can show text from these fields:
- Equipment Name
- Section Name
- Description
- HP
- Protective Device Amps
- Comments
To show the main breakers in the elevation view, enter a new row in the Description tab, enter the Load Type as Load, and enter the description.
- Column Number: This is the ordinal number of the column in which the starter (bucket) is located. The columns are arranged in increasing order starting from 1 and ending in the highest column number. See the picture below of Equipment Elevation and the corresponding Description tab.
- Starter Space: Height of the space in terms of the column width.
If there are multiple items in the same column, they appear in the order they are entered in the Description spreadsheet.
View the Elevation
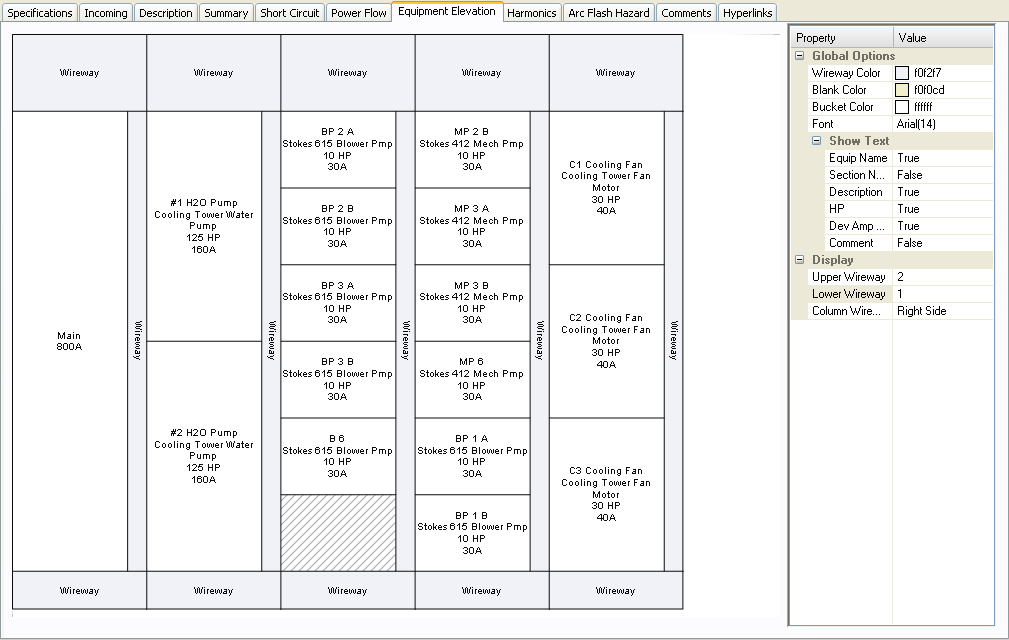
The Equipment Elevation tab of the MCC dialog box displays the elevation drawing.

Figure 2: MCC Elevation View
In the Property pane on the right of the elevation, you can:
- Specify the height for the top and bottom horizontal wireways and the vertical wireway.
- Change the column number and space size by selecting the bucket first in the elevation and then changing the parameters.
Print the Elevation
To print the elevation view, click  Print on the MCC toolbar.
