One-line Symbols Tab
EasyPower's customizable options are set up under Tools > Options.
The One-line Symbols tab is where you can specify how symbols appear on your one-lines. You can choose from ANSI or IEC symbols. You can also export the symbols to create custom symbol files that you can then import into another one-line or use as a default symbol template.
Each one-line has its own set of symbols. If you send your .DEZ file to another EasyPower user, they see the same symbols because the symbols are embedded in the file.
Note: If you copy and paste equipment items from one one-line to another, EasyPower displays the symbols based on the settings for the one-line in which the equipment appears.
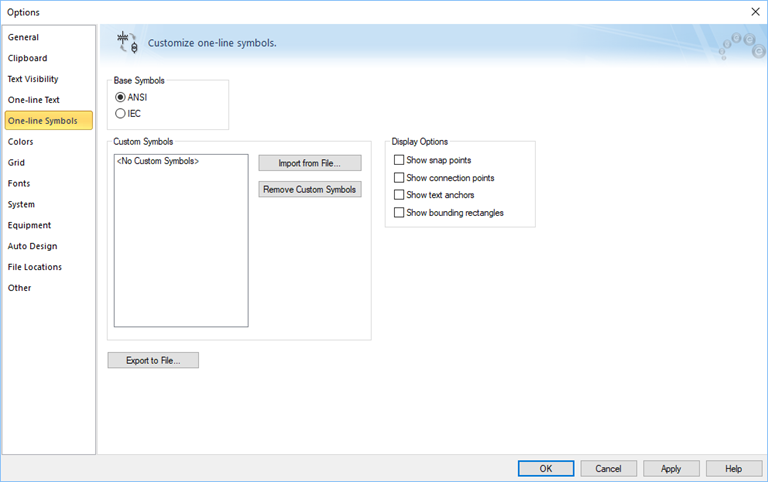
Figure 1: Symbols Tab of Options Dialog Box
| Option | Description |
|---|---|
|
Base Symbols |
EasyPower includes a default set of symbols based on the standard you select here. ANSI symbols are the basis for all symbols used on a one-line.
This option also controls which symbols appear in the EasyPower program (on the Equipment Palette or the mouse pointer, for example). If you have multiple one-lines open with different base symbols, the program displays the symbols based on the currently active one-line. |
|
Custom Symbols |
Note: When you import a file, all existing customization is removed and replaced with the new custom symbols. If a previously customized symbol is not defined in the new import file, EasyPower displays the base symbol, as the previous customization will have been removed. If you import custom symbols and later change the template on which the custom symbols were based, you must import the template again for the changes to be reflected on the one-line. Custom symbols are only visible on the one-line itself and do not appear in the EasyPower program elements such as the Equipment Palette or the Insert tab. |
|
Display Options |
The display options assist you when you customize symbols. You can see additional information on the one-line when these are selected.
|
|
Export to File |
Use this option to export symbols into a new file that you can edit for customization and then import back into the one-line. You can export:
Note: If you need to be able to combine different standard or custom symbols into the same file, create separate export files and then use a program such as Notepad to manually merge the contents into a single file for modification and importing. |
More Information
| Customizing EasyPower | Customizing the One-line Text |
| Adding Display Conditions |
|
|