Schedules
Insert a Schedule
You can insert schedules of panels, MCC and buses in the one line.
To insert a schedule:
- Select the panel, MCC or bus.
- Right-click and select Schedules, then click Insert Schedule. The schedule spreadsheet is inserted on the one-line. You can drag the schedule to place it in the desired location.
Tip: To insert schedules for multiple items at one time, select the items with the mouse while holding down the SHIFT key.
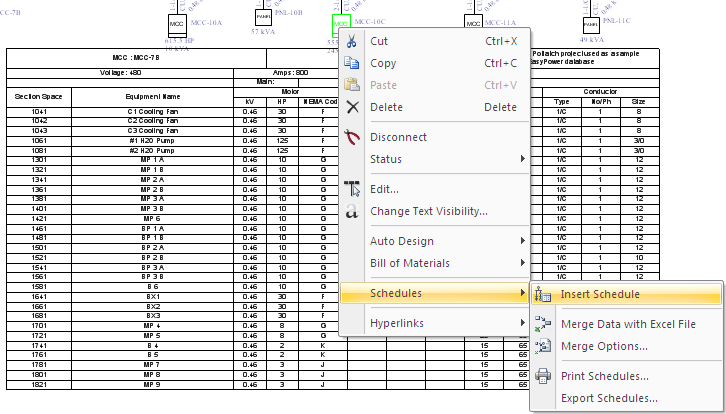
Figure 1: Inserting an MCC Schedule in the One-line
Tip: You can also insert schedules by first selecting the bus, MCC, or panel, and then clicking  Insert Schedule on the Equipment Palette or Insert tab.
Change Schedule Drawing Scale
You can change the drawing scale of schedules in the equipment options.
- Click Tools > Options > Options Dialog, and then click Equipment.
- Change the percentage of the scale under Schedule Defaults.
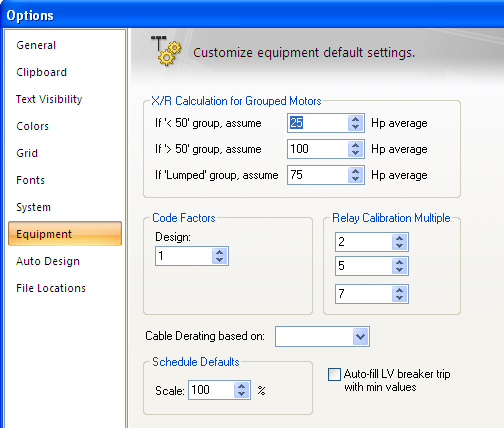
Figure 2: Schedule Default Scale in Options Dialog Box
Deleting Schedules
To delete the schedules from the one-line, select the schedule and press DELETE.
Merge Data with an Excel File
You can export the schedules of MCC, panels, and buses to Excel files, as follows:
- Select the desired equipment.
- Right-click and select Schedules > Merge Data with Excel File.
- Select the path for the file, and then click OK.
Tip: To select multiple equipment items, select the items with the mouse while holding down the SHIFT key.
After the file has been created, you can repeat the process to add more schedules to it. Each equipment schedule is placed in separate sheets within the same Excel file. The sheet is named with the ID name of the bus, MCC, or panel. If you merge the schedule data twice, this overwrites the previous data. You can format the sheets or cells in the Excel files. The format remains the same even if the data is updated.
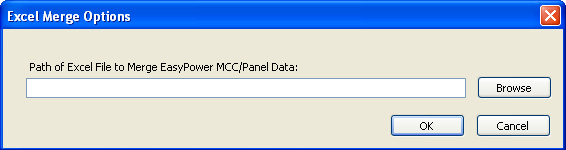
Figure 3: Excel Merge Options for Schedules
Printing Schedules
To print schedules, right-click on the bus, MCC or panel, and click Schedules > Print Schedules. Select the items for which you want to print the schedules, and then click OK.
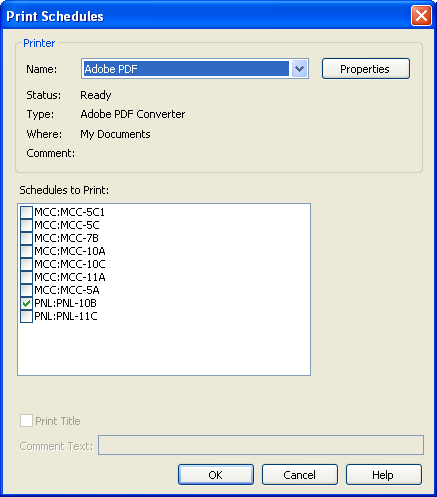
Figure 4: Print Schedules Dialog Box
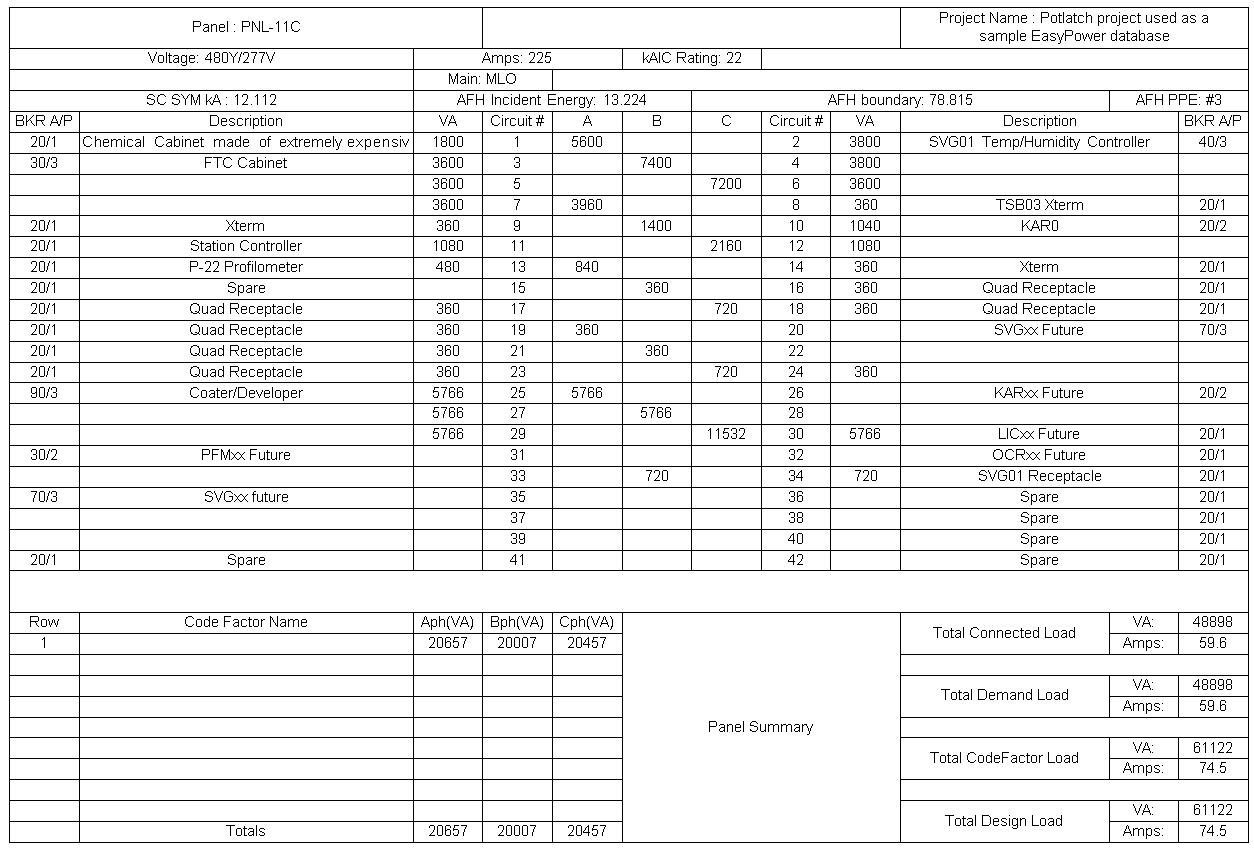
Figure 5: Printout of a Panel Schedule
Showing SC kA and Arc Flash Hazard in Panel Schedules
You can display the short circuit currents and arc flash hazard results in panel schedules.
- Short Circuit: To show the short circuit kA in the schedule for any panel, open the Short Circuit focus and click Fault Bus(es) > Advanced > Fault and Store Sym kA. This stores the short circuit result to the panel database. For the SC value to appear, your panel schedule template must have the variable specified. See Schedule Templates for more information.
- Arc Flash Hazard: To show the arc flash hazard in the schedule for any panel, open the Short Circuit focus and click Fault Bus(es) > Advanced > Fault and Store Arc Flash. This stores the arc flash hazard results to the panel database. For the arc flash value to appear, your panel schedule template must have the variable specified. See Schedule Templates for more information.
Export Schedules
You can export schedules to DXF or XML files. AutoCAD can read DXF files and Excel can read XML files. Right-click on the MCC, panel or bus, and click Schedules > Export Schedules. You can specify the path for the export file, the name, and the type of file. If you have multiple schedules, you can export them to the same file or to separate files.
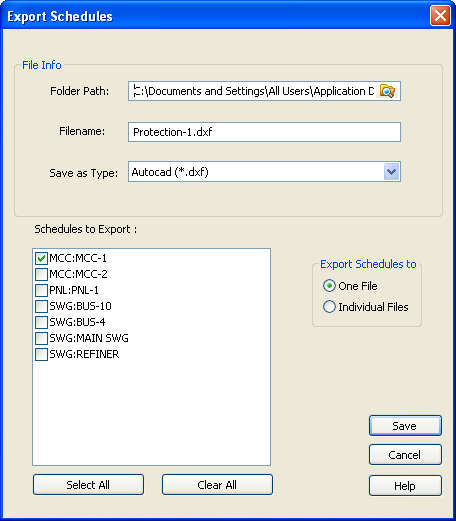
Figure 6: Export Schedules Dialog Box
More Information
| Making One-line Diagrams | Schedule Templates |
| Selecting Items | Abbreviations in Schedule Load Types |
| Schedule Variables |