Family Mapping Examples
In this section, we demonstrate some examples that describe how the different mapping options are used.
Note that if you select a data file next to Based on Revit data, you can preview the results of your mapping.
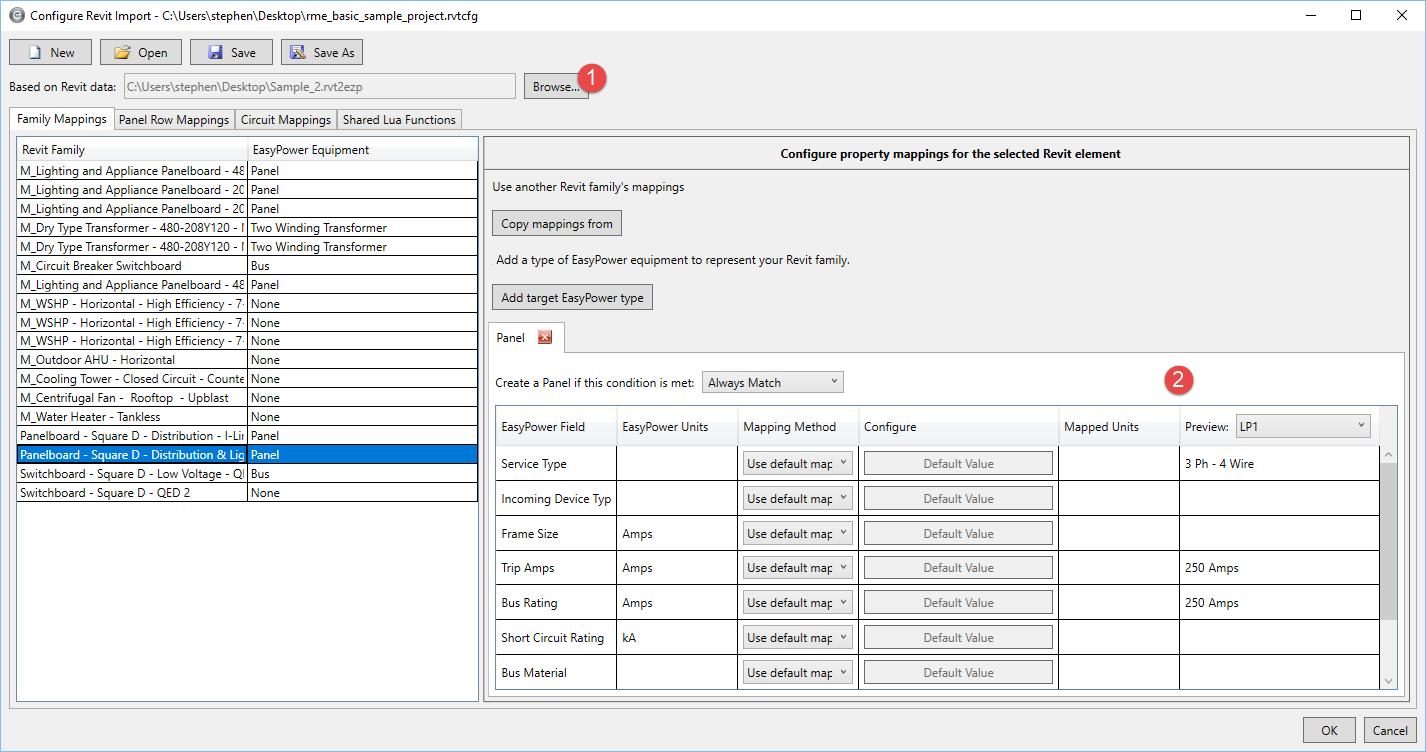
Figure 1: Preview Mapping Results
Use Default Mapping
The default mapping is the simplest mapping option. EasyPower uses default mappings to determine the mapping values.
In the example show below, the selected switchboard is mapped to a bus type of switchboard, and the values for Bus Type, Bus Rating and Bracing are determined by the default settings. The switchboard "MSB" has been selected in the Preview list, so the default values for the switchboard appear in the column.

Figure 2: Switchboard Set to Use Default Mapping
Determining How Default Mappings are Derived
The EasyPower program determines the default mappings. To learn how the default mapping is derived, click Default Value. The program displays a message that describes the default mapping, similar to the one shown below.
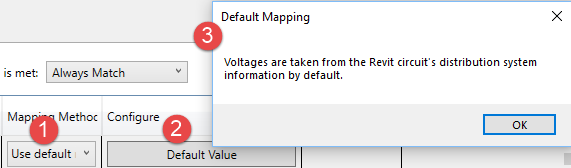
Figure 3: Default Mapping Message
If you want different values, use one of the other mapping options to override the default settings.
Map Revit Values
You can map to Revit values. You can select the Revit parameter and specify which Revit values to associate with each EasyPower value. You can have multiple values for each parameter. This effectively enables you to map a single Revit parameter into more than one value. This option is only available when the corresponding EasyPower value is part of a list.
In this example, for the panelboard, the mapping for the Service Type is set to map to Revit values.
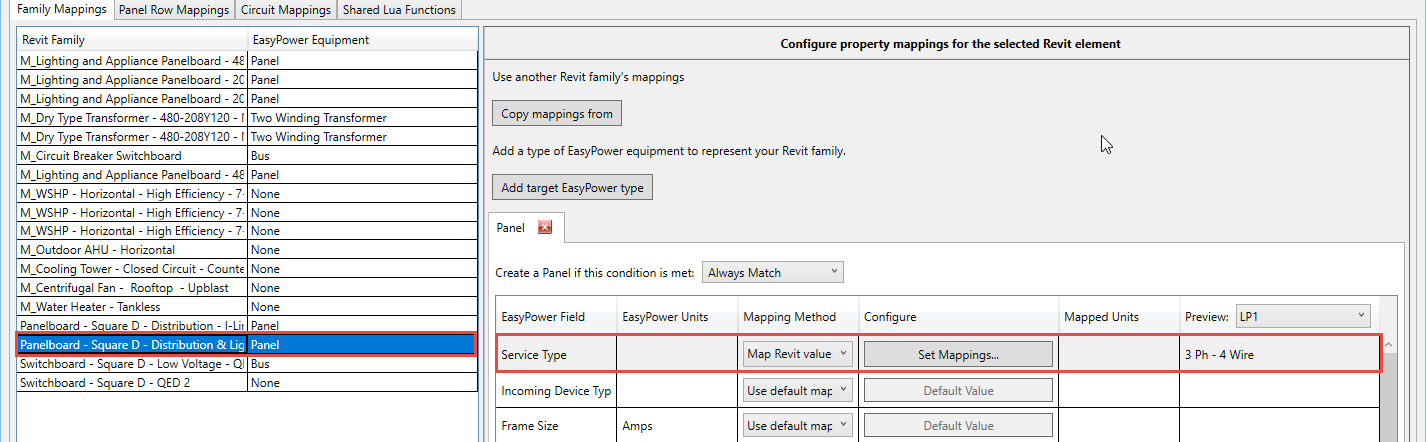
Figure 4: Panelboard Using Revit Values for the Service Type
Click Set Mappings to see the parameter and the associated Revit values. In this case, for the Revit parameter Distribution System, there are several Revit values associated with various EasyPower phase and wire configurations.
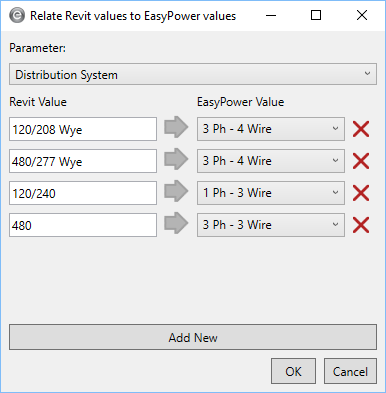
Figure 5: Mapping Revit Values for the Distribution System Parameter
You can add additional values the to the Revit parameter by clicking Add New, typing a new Revit Value, and then selecting the EasyPower Value from the list.
Use Revit Parameter
You can select to use a specific Revit parameter and map it to an EasyPower field.
In the example below, the EasyPower field Enclosure is mapped to the Revit parameter named Enclosure. The result in the preview for 2lP-1 is NEMA-1.
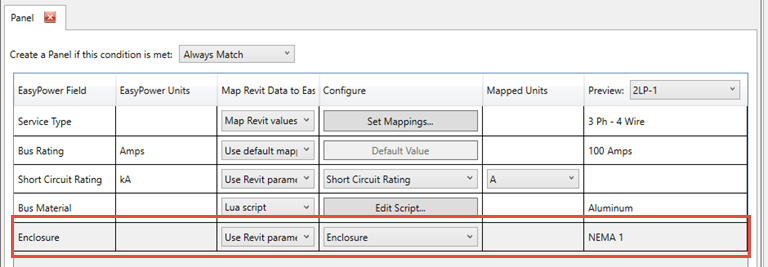
Figure 6: Use Revit Parameter Example
Similarly, the Short Circuit Rating is also mapped to the Revit parameter Short Circuit Rating. In this case, the EasyPower units are in kA, but the mapped units are set to amps.
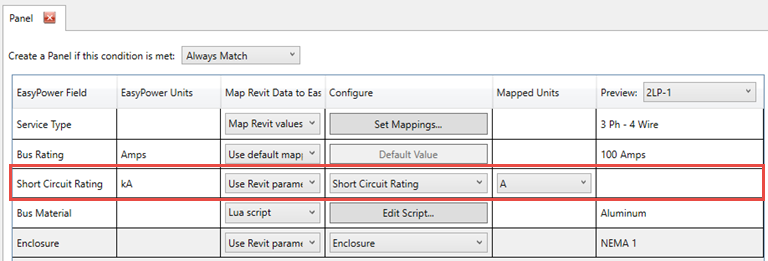
Figure 7: Use Revit Parameter Example, with Units
Enter a Value
In this example, the configuration for the various EasyPower fields have been set by entering a value for each.

Figure 8: Entering Values
When you enter a value, you can select from a list or to manually type a value.
Lua Script
In this example, a Lua script is used to display the "Mounting" parameter as defined in Revit for the EasyPower field.
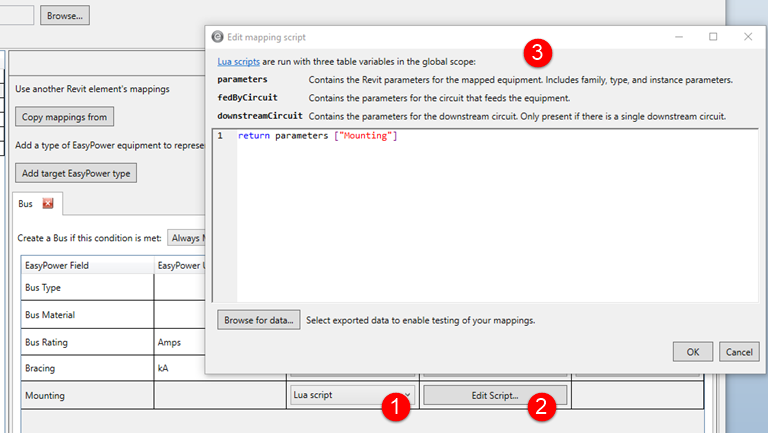
Figure 9: Edit Lua Mapping Script Example 1
In this example, a Lua script is used to display the "Busbar Material" parameter as defined in Revit for the EasyPower field.
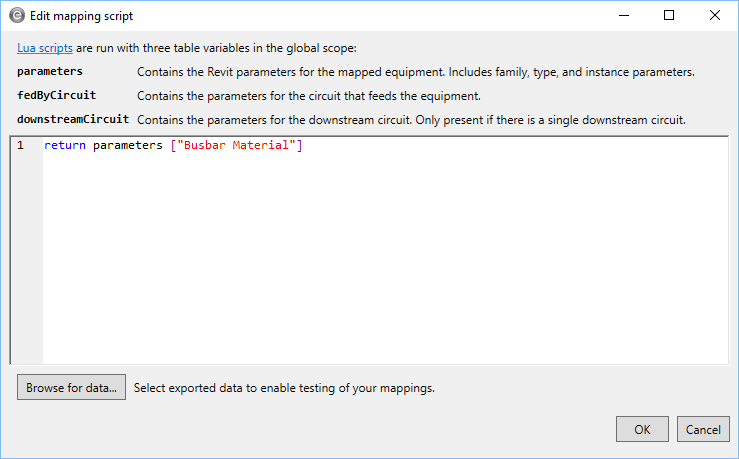
Figure 10: Edit Lua Mapping Script Example 2
For additional examples, including using shared Lua functions within Lua scripts, see Lua Scripts.
More Information
| Family Mappings | Copy Mappings |