Family Mappings
You can map Revit families directly to EasyPower equipment types. You can copy mappings from another Revit element or add a target EasyPower type. If you select to add a target EasyPower type, you can set conditions for the mapping and specify whether to use default values, Revit values, input your own values, or use a Lua script.
Essentially, this means you can set up how you want the Revit element to be brought into EasyPower. For example, you might want to import a panelboard as a bus (which does not have schedule information) or as a panel (which has schedule information). This affects how the panelboard appears in the EasyPower one-line and also affects the data associated with it.
In another example, you may want to specify particular Revit families as loads or as motors. You can set up conditions to have additional control on how the EasyPower components are created from the Revit data.
Family Mappings Tab
When you select to configure mappings, the first tab to appear is the Family Mappings tab. The left side of the tab lists the Revit Family and the corresponding EasyPower Equipment. If a Revit family has not been mapped to an EasyPower equipment type, the program indicates this state.
In the image shown below, the centrifugal fan is Not Mapped, the switchboard is mapped to a Bus, the various transformers are mapped to a Two Winding Transformer, the 208V and 408V panelboards are mapped to a Panel, and so on. The bus is selected, so its mapping information appears on the right side of the window.
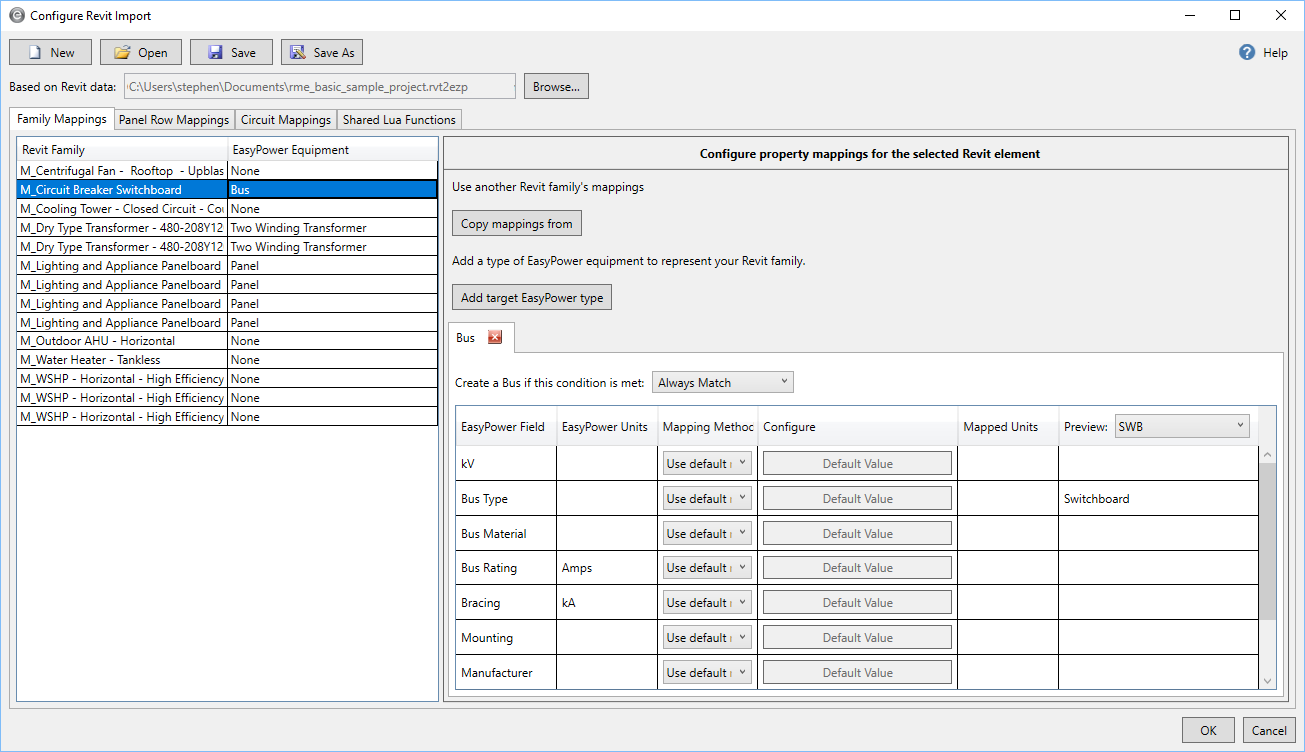
Figure 1: Family Mappings Tab
By looking more closely at the right-side of the window, you can see that the bus has condition set to Always Match. This is the default condition. You can have multiple target EasyPower types and apply separate conditions to each. This gives you the ability to create different types of EasyPower equipment based on the configuration you specify.
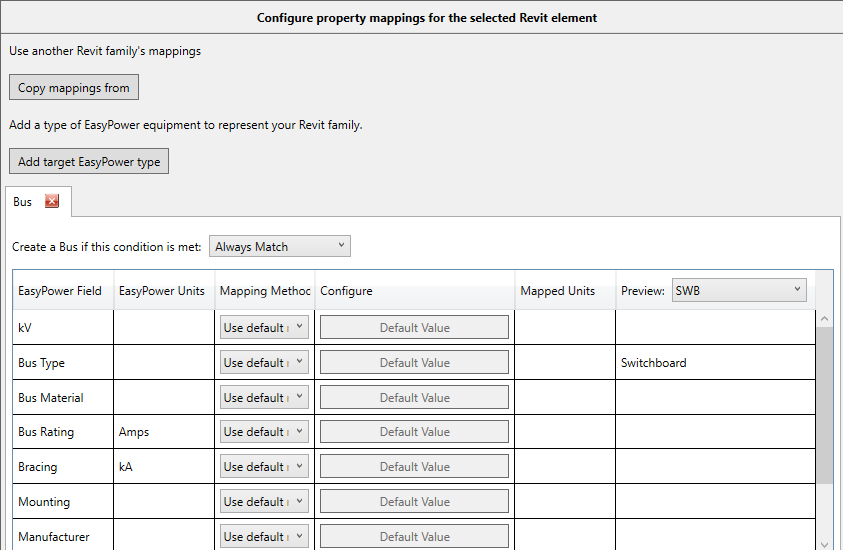
Figure 2: Mapping Conditions
The mapping area displays the EasyPower fields and units and lets you select how you want to map the Revit data to EasyPower. The default mapping is used unless you specify otherwise. Depending on the mapping option you select, you can configure the value, and for fields that involve units, you can specify the mapped units. You can preview the result for a specific piece of equipment by selecting the equipment in the Preview list, and the result appears in the Preview column.
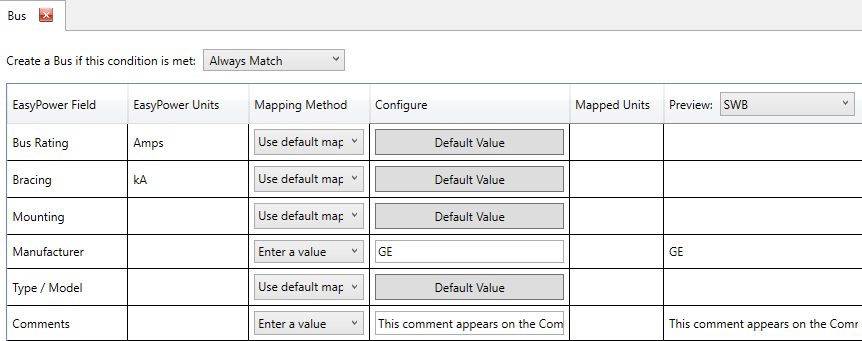
Figure 3: Mapping Preview
Tip: You can sort most of the columns in this dialog box by clicking on the column header. Each time you click on the column header, it alternates between ascending or descending values. A small arrow appears in the column header to let you know the column is sorted and it indicates whether the sort is ascending or descending.
Mapping Options
There are several possible mapping options for each EasyPower field. The options may be slightly different depending on the EasyPower field selected.
- Use default mapping: This setting uses the default EasyPower type the program specifies for the field based on the Revit family. This is the simplest option, but may not give you the exact result you want. To learn how the default mapping is derived, click Default Value.
- Map Revit values: This setting enables you to map the EasyPower field to a Revit value. You can select the Revit parameter and specify which Revit values to associate with each EasyPower value. You can have multiple values for each parameter. This effectively enables you to map a single Revit parameter into more than one value.
- Use Revit parameter: This setting enables you to select a specific Revit parameter for the EasyPower field. When this option is used, you can also specify the units you want brought into EasyPower.
- Enter a value: This setting enables you to enter a specific value for the EasyPower field. For fields with EasyPower units, you can also specify the units you want brought into EasyPower.
- Lua script: This setting enables you to use a Lua script to determine the field values. You can create Lua scripts for each individual EasyPower field.
For examples of the different mapping options, see Family Mapping Examples.
Deleting Family Mappings
It’s possible to have families loaded into your Revit project that do not actually have instances in the project. If you remove them, this cleans up the Revit project, but you probably want to do the same in the Revit import configuration.
You can delete family mappings from the import by right-clicking on a row and clicking Delete selected family.
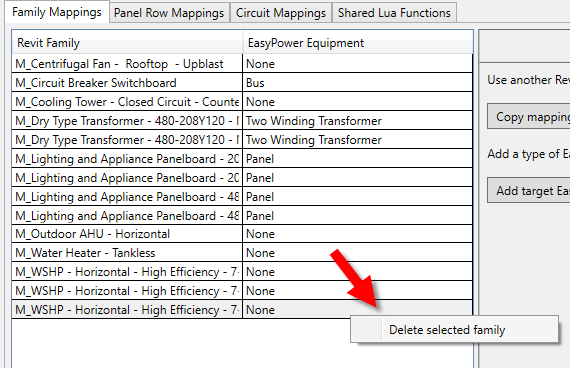
Figure 4: Delete Selected Family
More Information
| Mapping Revit to EasyPower | Circuit Mappings |
|
|