Place Buses on the One-line
The central equipment type of every one-line is the bus. A bus defines the connection point for two or more pieces of equipment. Equipment items which are not yet connected to a bus are highlighted in red.
To add a bus to the one-line, click  Bus in the Equipment Palette or Insert tab. The pointer changes to the shape of a bus as you move back to the one-line. Click on the location where you want to position the bus. You can continue adding buses in this way until you click on another palette button.
Place buses in the drawing as shown below by clicking the left mouse button and dragging each bus to the one-line.
Tip: You can set a default base kV for new buses by selecting
Tools > Equipment > Bus.
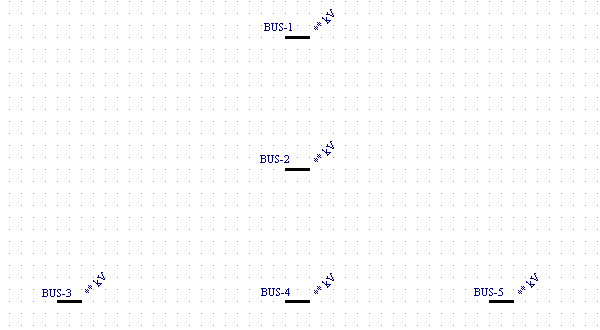
Figure 1: Inserting Buses
Adjusting Bus Sizes and Locations
With the pointer set as a selection arrow, you can move and size the buses. You move buses or ID names by dragging them with the left mouse button.
- When you bring the pointer close to a bus, a four-headed arrow
 appears. Left-click and drag to move the bus.
- When you move the pointer close to the either end of the bus, a double-headed arrow ↔ appears. Change the size of a bus by dragging either end of it with the left mouse button. You can even shrink it to a single dot or “node” so that it takes up less room.
After experimenting with moving and sizing the buses, arrange them as shown below.
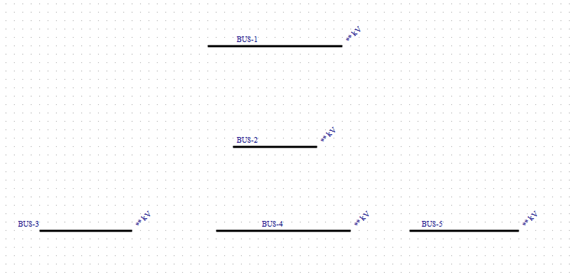
Figure 2: Moving and Sizing Buses
Entering Bus kV Data
Enter the bus data by double-clicking on each of the bus symbols with the select pointer  . The Bus Data dialog box is displayed each time and you can enter the base kV for the bus and then click OK to save the change. Use 13.8 kV for the top bus and 0.48 kV for the others. You can also
change the ID names to make them more descriptive.
. The Bus Data dialog box is displayed each time and you can enter the base kV for the bus and then click OK to save the change. Use 13.8 kV for the top bus and 0.48 kV for the others. You can also
change the ID names to make them more descriptive.
Tip: If you have a large number of buses for which you need to set common values such as the kV, use the copy and paste features to quickly copy from one bus to multiple buses. See Copy and Paste for more information.
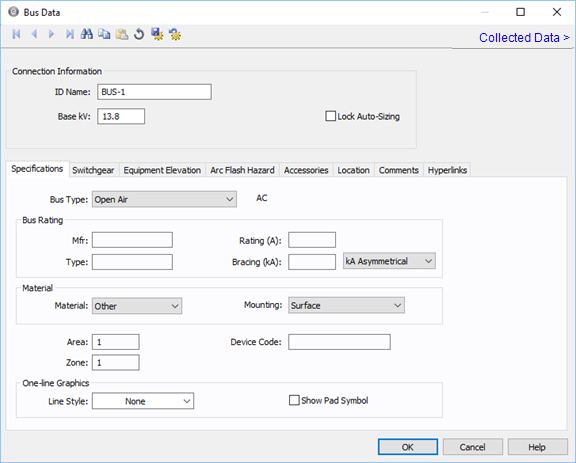
Figure 3: Bus Data
Next: Add Equipment to the One-line