Temporary Data Dialog Boxes
Double-clicking on certain devices while you are in the Coordination focus displays a dialog box containing a subset of the dialog box you see from the Database Edit focus. These dialog boxes let you temporarily change specific coordination data during an analysis. Temporary changes while in analysis can be saved to the database. The changes can be saved to the base-case or in a scenario using Scenario Manager.
Temporary Data Dialog boxes are similar to device data dialog boxes described in Database Technical Reference. However, a few special features are available in the temporary data dialog boxes, such as the Appearance tab. This tab enables you to designate the color, pattern and border style of the TCC curves with which you are working. The Appearance tab appears on the temporary data dialog box only when the TCC plot mode is active. Other specific features are described by equipment type. For your reference, the item’s ID name and connection information is shown at the top of the dialog box. In some cases, other reference information is also shown (for example, the Base kV for a fused switch).
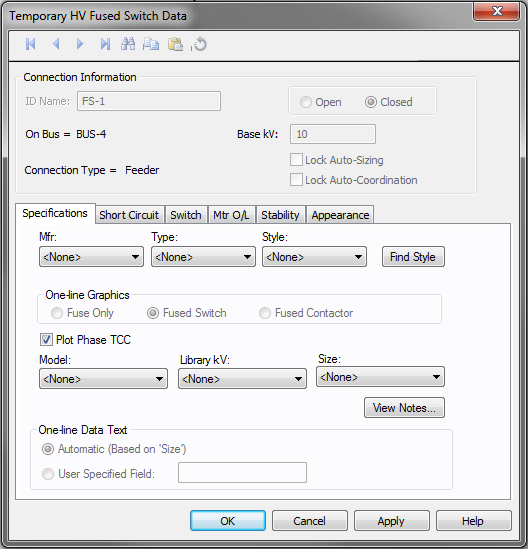
Figure 1: Temporary Data Dialog Box
You can open the temporary data dialog box in several ways:
- Double-click on the device in the one-line in Coordination focus.
- Double-click on the device in the one-line panel in TCC plot mode.
- Double-click on the TCC plot of the device.
Temporary Data Dialog Boxes and TCC Plots
When you adjust the device settings by dragging the curve on the TCC plot, the new settings appear on the temporary data dialog boxes. Similarly, you can modify the TCC curve by adjusting the settings in the temporary data dialog boxes. A convenient way of working with temporary dialog boxes is to drag it to a side so that the TCC plot can be seen completely, and then to click Apply after making the changes. The effect of modification can be seen immediately on the TCC plot and the dialog box remains open.
Dragging a TCC enables you to change the settings of a particular device but not the manufacturer, type or style of device. With temporary data dialog boxes, you can change the manufacturer, type or style of device.
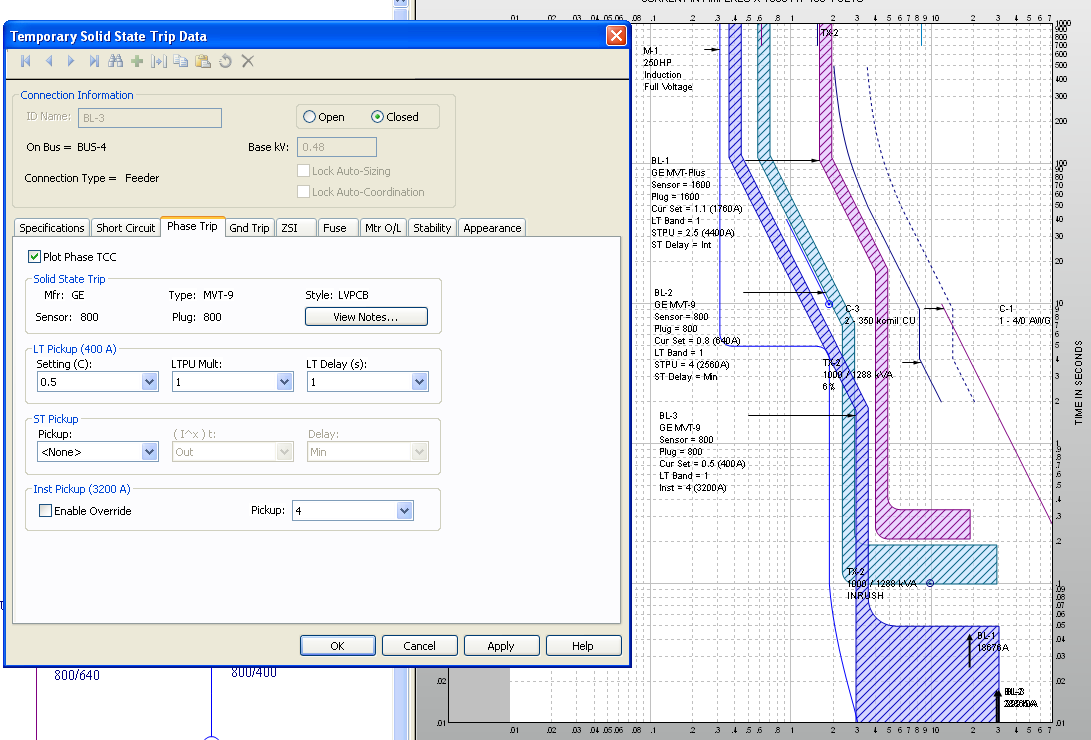
Figure 2: Temporary Data and TCC Plot
TCC Clipping
TCC clipping enables you to clip the curves by the maximum short circuit current the device may see. This is a useful tool since you do not need to coordinate devices at currents higher than the maximum short circuit current for the device. TCC Clipping is available in the Short Circuit tab of equipment data dialogs. You can select the type of fault current to clip the TCC plot. If you select <None>, then the curve is not clipped. Other choices are Momentary, Interrupting, and 30 Cycle for ANSI, or Initial, Breaking, and Steady State for IEC. To clip a TCC, you must specify the Default Phase Short Circuit values on the Short Circuit tab.
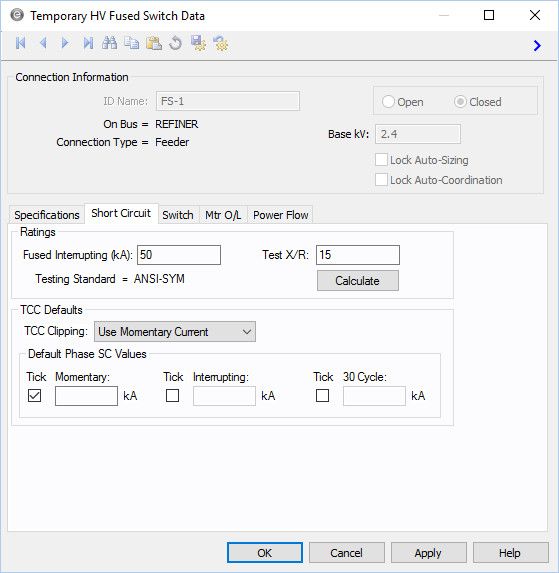
Figure 3: Short Circuit Tab of Temporary Fused Switch Data Dialog Box (ANSI)
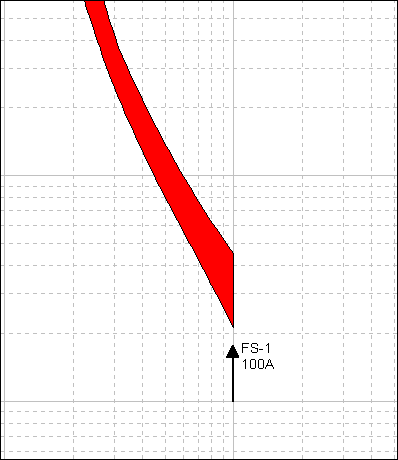
Figure 4: Example of TCC clipped at 100A
Saving Temporary Data
When you exit the Coordination focus and change to Database Edit mode, the temporary data becomes lost and the device data defaults to the original data stored in the Database Edit mode. To keep the changes you made in the temporary data, you need to save the file. When you save, you are asked if you want to save the temporary changes. Click Yes to keep the changes. When you do so, the settings selected in the temporary data replace those in the database.

Figure 5: Save Temporary Changes
More Information
| Coordination with PowerProtector™ |