Puede personalizar el texto que aparece en el diagrama-unifilar. Puede formatear la apariencia del texto para los elementos individuales del equipo y puede especificar las condiciones de visualización que controlan cuando aparece el texto. After you create a custom text template, you can select it and embed it on your other one-lines.
Para personalizar el texto de diagrama-unifilar para un elemento:
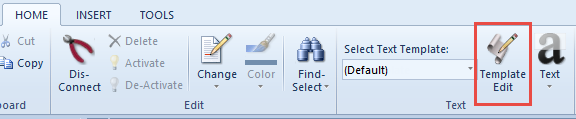
- From the Home tab, click Template Edit.
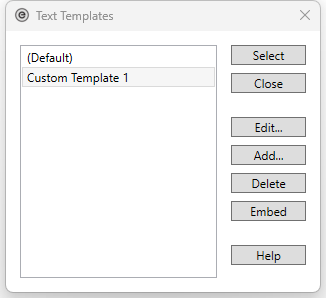
- You can edit an existing text template using the Edit button, or create a new text template by clicking Add.
- The Edit option enables you to change an existing template. Use this if you already have a custom template to which you want to make changes.
- The Add option enables you to create a text template from a blank template. You will need to set up the text customizations for each equipment item type.
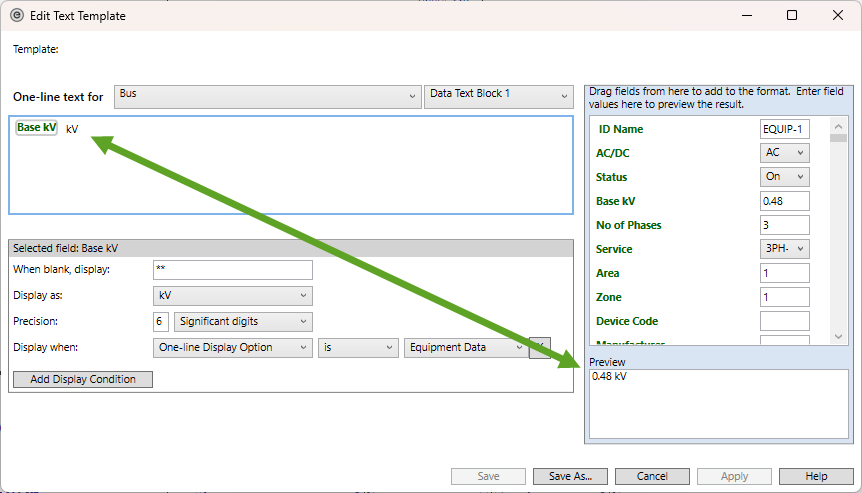
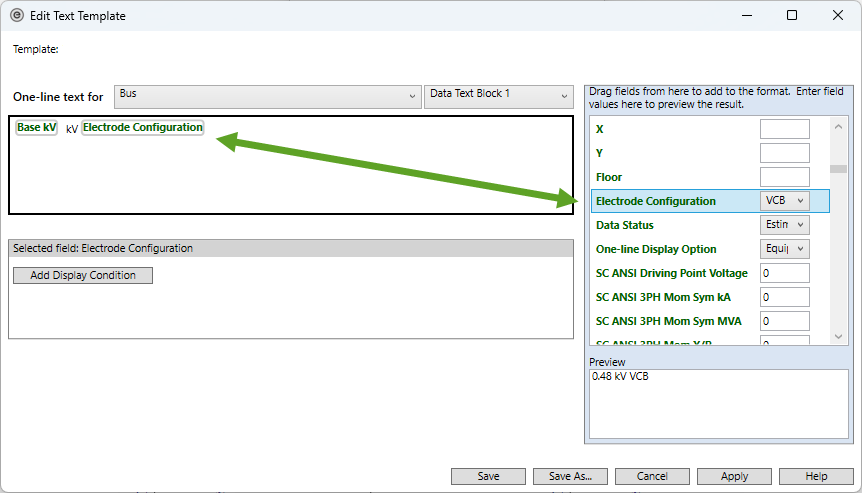
- Cerca de Texto de Diagrama-unifilar para, seleccione el elemento para el que desea formatear texto. For example, we have selected to edit a bus. El formato actual aparece en el cuadro de formato y en el área Vista previa en la parte inferior derecha.
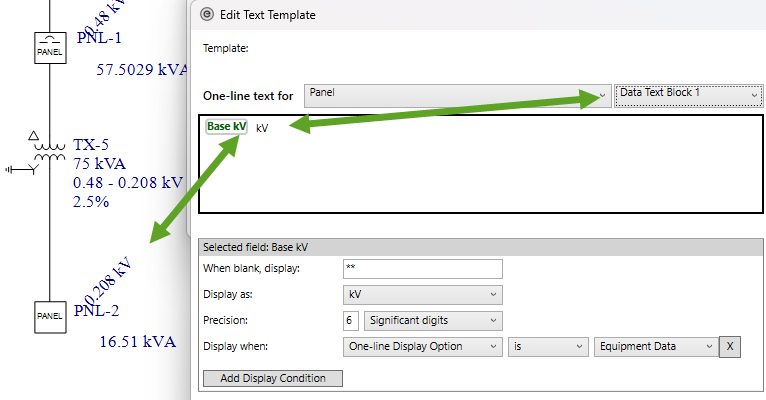
- Most items only have one Data Text Block you can format; however, buses, panel schedules, MCCs, and tool points of connection have two. El primer bloque de texto aparece por encima del segundo en el diagrama-unifilar.
- Arrastre los nombres de campo verde de la columna de la derecha al área en el cuadro de formato donde desea que aparezcan. Como alternativa, puede hacer doble clic en el nombre del campo para colocar el campo seleccionado en el cuadro de formato en la ubicación del puntero.
- Puede escribir texto estático en el cuadro de formato, si lo desea. Utilizar el Vista previa para controlar el espaciado. En el ejemplo de la figura anterior, "kV" es texto estático. "VCB" is variable text that could change depending on the electrode configuration data entered in the Bus Data dialog box.
- Presione ENTRAR al final de una línea para iniciar una nueva línea de texto.
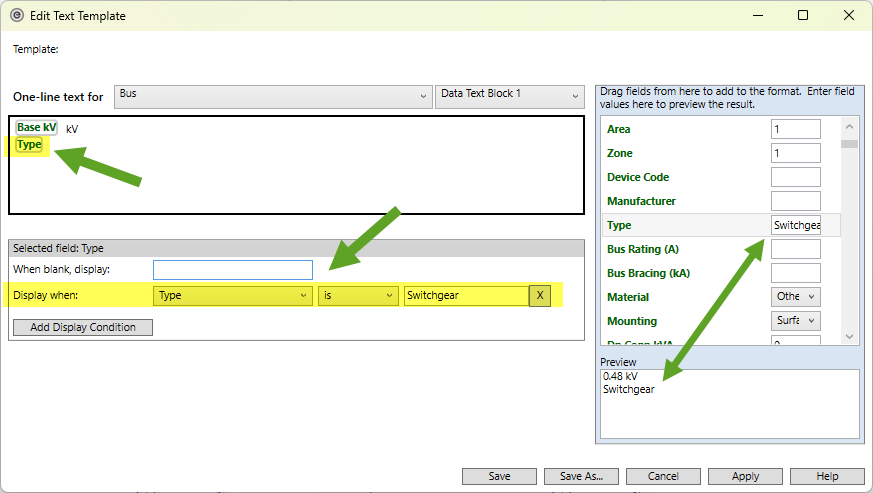
- Para agregar condiciones de visualización, seleccione el campo o texto para el que desea crear una condición de visualización, haga clic en Añadir Condición de Visualización y luego seleccione las opciones de visualización. Esto controla si el campo o el texto aparecen en el diagrama-unifilar en función de las condiciones seleccionadas. Ver Para Agregar Condiciones de Visualización para más información.
- Utilice la columna de la derecha para establecer valores de vista previa y ver una vista previa de los cambios. En el ejemplo siguiente, hemos añadido el campo Tipo al cuadro de formato y establezca una condición de visualización para mostrar el texto si el valor se establece en "Switchgear" ("Tablero de distribución"). En el área de vista previa, aparece el texto "Switchgear". Si escribe un valor de vista previa diferente al de Tipo, el valor ya no aparece en la vista previa.
- Para valores numéricos que muestran decimales, puede especificar la precisión en el número de decimales que se muestran. Ver Precisión Decimal para más información.
- When you are finished making changes, do one of the following:
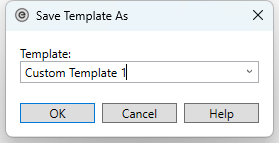
- Click Save As to save your changes to a new custom template. You can type a new template name and then click OK.
Click Save to save your changes to an existing custom template.
-
Click Close to close the Text Templates dialog box.
- Your custom template is displayed in the Select Text Template list and is automatically applied to the one-line.
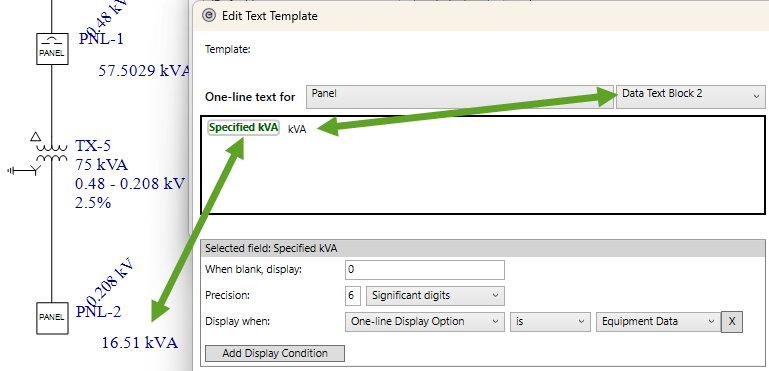
Si tiene una serie larga de texto en una sola línea que desea poder separar (por ejemplo, aplicar diferentes condiciones de visualización a cada conjunto de texto), inserte un separador de texto. Ver Para Insertar un Separador de Texto para más información.
Below, we have typed a different value from the display condition. The Preview area shows how the information appears on the one-line when the display condition is not met.
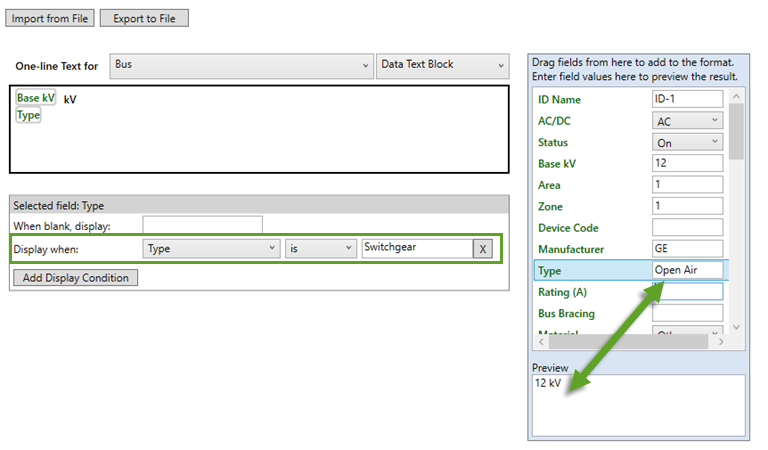
Nota: El texto de vista previa solo se utiliza como ejemplo. El texto actual que aparece en el diagrama-unifilar se basa en la información escrito en el cuadro de diálogo de datos del elemento.
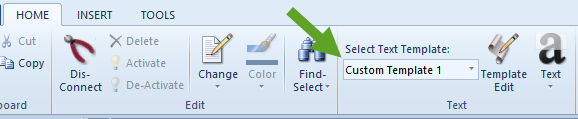
If you create multiple custom text templates, you can use the Select Text Template option to apply the desired template to the one-line.
Más Información
- Select Text Template
- Para Agregar Condiciones de Visualización
- Precisión Decimal
- Para Restablecer el Texto
- Archivos de Plantilla de Texto
- Para Personalizar EasyPower
- Para Insertar un Separador de Texto
- Para Configurar Texto Predeterminado para Diagramas-unifilares Nuevos
- Edit Text Template Dialog Box
- Pre-configured Text Templates