Managing Licenses
You can have multiple licenses on a single EasyPower product installation. For example, you could have a license for Oneline Designer and another for the full EasyPower program, both of which that you want to use on the same computer. You can switch between the two, using the less-featured program most of the time but elevating to the more advanced version of the program as you need it.
Adding Additional Licenses
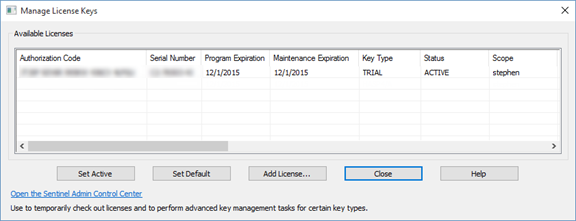
After you have installed EasyPower and authorized your first license, you can add additional licenses using the Manage License Keys feature. Use Tools > Manage Licenses to add licenses, set a license as active, or set a default license.

Figure 1: Manage License Keys Dialog Box
To add another license, click Add Licenses. In the Product Activation dialog box, enter your new license, and then click Next.
Select whether you want to participate in the EasyPower Product Improvement Program, and then click Finish.
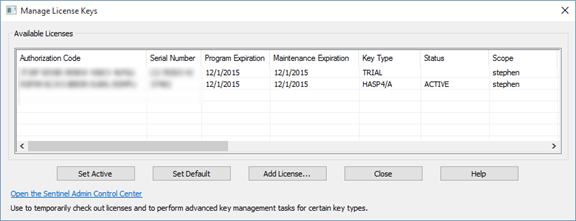
The additional license appears in the Manage License Keys dialog box and is set as the active license.

Figure 2: Manage License Keys Dialog Box - Multiple Licenses
Tip: You can scroll to the right to see additional information about the license, including the HASP ID, IP Address, Machine Name, Bus Limit, and features available to the license.
Setting the Active License
An "active" license is simply the license currently in use. If you have multiple licenses, you can switch between the licenses by making the one you want active. In the example mentioned above, if you have a license for Oneline Designer that is currently active, but you want to use EasyPower, you can set the EasyPower license as the active license.
To set the license as active, select the license from the list, and then click Set Active. The license remains active for this session, unless you change it.
The next time you start the software, you will be asked which license you want to use. You can also set a default license to start with each time you start the software.
Setting the Default License
If you set a default license, this is the license EasyPower uses each time you start it. You still have the option to set a different license as the active license in Manage Licenses, but the program always starts with the default license first.
Starting EasyPower with Multiple Licenses
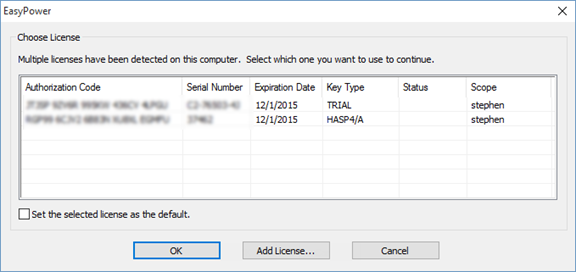
When you start EasyPower on a computer that has multiple licenses, you can select the license you want to use for the session.
Tip: You can also set a default license to use every time the program starts by selecting the license and the selecting the Set the selected license as the default check box. If you want to set the default license later, you can do so in Tools > Manage Licenses.

Figure 3: Choose License Dialog Box
Select the license you want to use, and then click OK. If none of the existing licenses are available (for example, because they are all expired), you can click Add License to add and authorize a new license.
Tip: You can scroll to the right to see additional information about the license, including the HASP ID, IP Address, Machine Name, Bus Limit, and features available to the license.
Checking Out a License
If the license key is a HASP SL NET type key, you can check it out temporarily to use on another computer. This temporarily detaches the key and enables you to attach the key to a different computer.
This action must be performed in the Sentinel Administration Control Console. To open the console, from the host computer on which you want to detach the license, do either of the following:
- Click Tools > Manage Licenses, and then click Open Sentinel Admin Console. In the Open Sentinel Admin Console dialog box, click Open.
- Open a browser and navigate to http://localhost:1947.
See Temporarily Detaching Software Licenses for detailed instructions.
More Information
| Installing EasyPower | Managing License Sessions |
| Authorizing Your Software | Temporarily Detaching Software Licenses |

|