Configuring the EasyPower Import
There are some additional configuration options you can control when importing from EasyPower to Revit.
To configure the import:
- In Revit, from the Add-ins tab, click Configure Import.
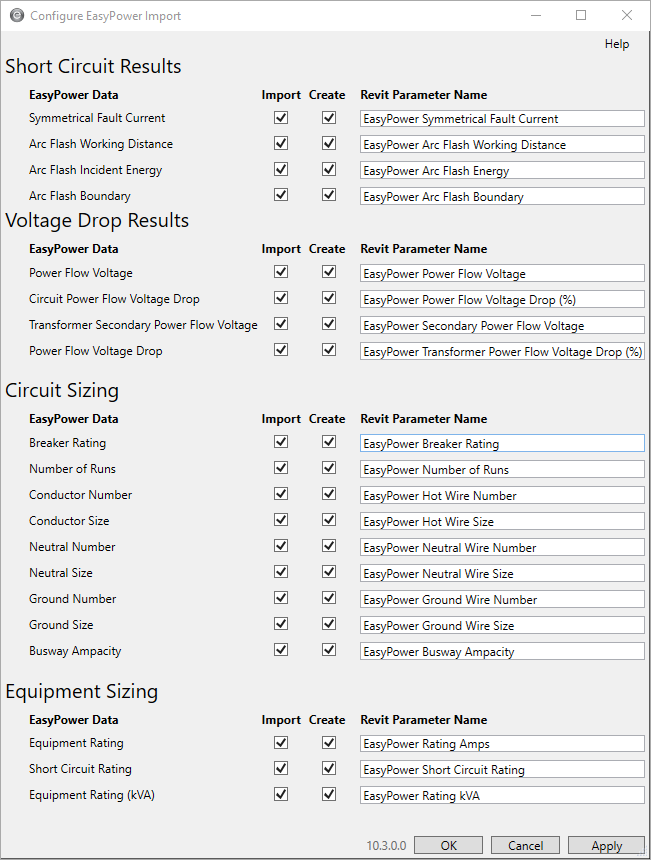
- In the Configure EasyPower Import dialog box, you can select the short circuit results, circuit sizing, and equipment sizing you want to include in the configuration. The EasyPower data appears on the left, and the Revit parameters that are associated with the data appear on the right. You can clear the Import check box to remove the items from the configuration. By default, all check boxes are selected.
- Click OK to save your changes.
If the Create check box is selected, EasyPower creates a Revit project parameter using the name specified, and the imported data is mapped to that parameter. If you clear the check box, you can use the mapping function to map the results or sizing to parameters you already have in Revit. See Mapping Revit to EasyPower for more information.
You can change the Revit parameter names if you want them to be something different than the EasyPower defaults.
For information about the values that are exported from EasyPower to be imported into Revit, see Export to Revit Details.
More Information
| Importing from EasyPower to Revit | |
|
|